
repair guide for pvc, p.u and hypalon
here is a guide to repairing your rib, with examples to show you correct preparation before you attempt.
before starting your inflatable repair
firstly you must take care with solvents and adhesives, use correct protective equipment where necessary.
getting started on your repair
its important that you work out what material your rib or inflatable is! here is a guide to make life a little easier
is my boat pvc,p.u or Hypalon?
Once you are certain you have established which you have it is important to purchase the correct adhesive.
hypalon
- bostik 2402
- polymarine
- apollo
Pvc
- polymarine pvc
- toobbond pvc
- ibs(inflatable boat supplies)
P.U
- bostic 2402
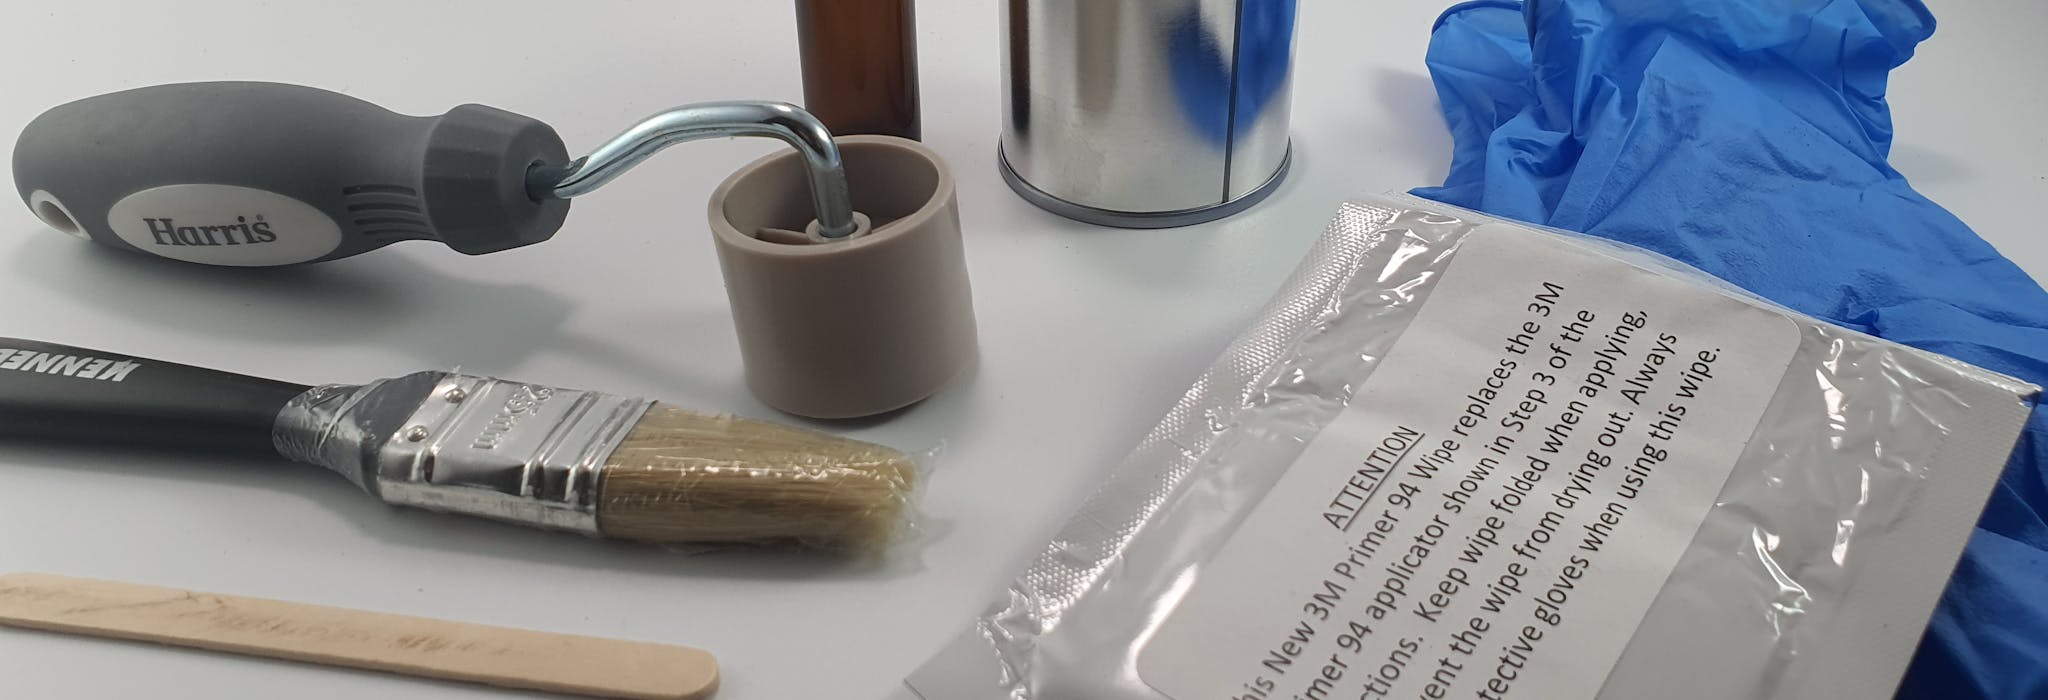
other tools you will require!
- seam roller
- heat gun
- 60 grit sand paper
- scissors
- stirring sticks for mixing adhesive
- lint free cloth
- pencil
- stiff metal scraper with rounded corners blunted off
- matching material to your tube
- a flat smooth surface to roll against
- adhesive/ disposable brush
- small amount of polythene sheet
- gloves
- benzene or atleast acetone solvent (MEK for pvc)
things to note
- pvc and p.u do not require sanding unless fabric is old and hard
- hypalon must always be sanded correctly
- use m.e.k solvent on pvc
- use toluene,benzene or bostik formula solvent on p.u and hypalon
how to find your leak!
The best way is to inflate the tube to about 2psi use good old fashioned fairy mixed with water. Spray on the usual places first seams,valves,scores,scrapes, cracks, if you know that one chamber going down and the rest are not, find the bulkhead/ partition and inspect the tube for damage, if none can be found check the valves. to do this dip a brush or your finger in the fairy liquid and draw it over the valve inlet till it forms a bubble, if it grows or keeps popping you may have found the issue to be sure spray the water in to the valve hole and see if bubbles start coming out. if you still cannot find anything start to cover the whole chamber and the ends of the rub band as it may use the strake to travel down the boat and exit at the end.
How bad is your leak?
When you have found the issue it can be repaired a few different ways!
- internal and external patches
- external patch
- opening a seam readhering and stick it back down
- sucking the tube down flat, using a scraper card smooth glue over the leak and let it dry completely for 24hrs
usually if a leak is under 2" it is safe to repair with an external patch on its own but, i would still recommend internal and external patches on anything other than a scrape or emergency repairs. sometimes you are better off making a hole bigger to be able to sand the inside,prime, glue, and also get a repair patch inside.
pvc repairs run down
few important things to note
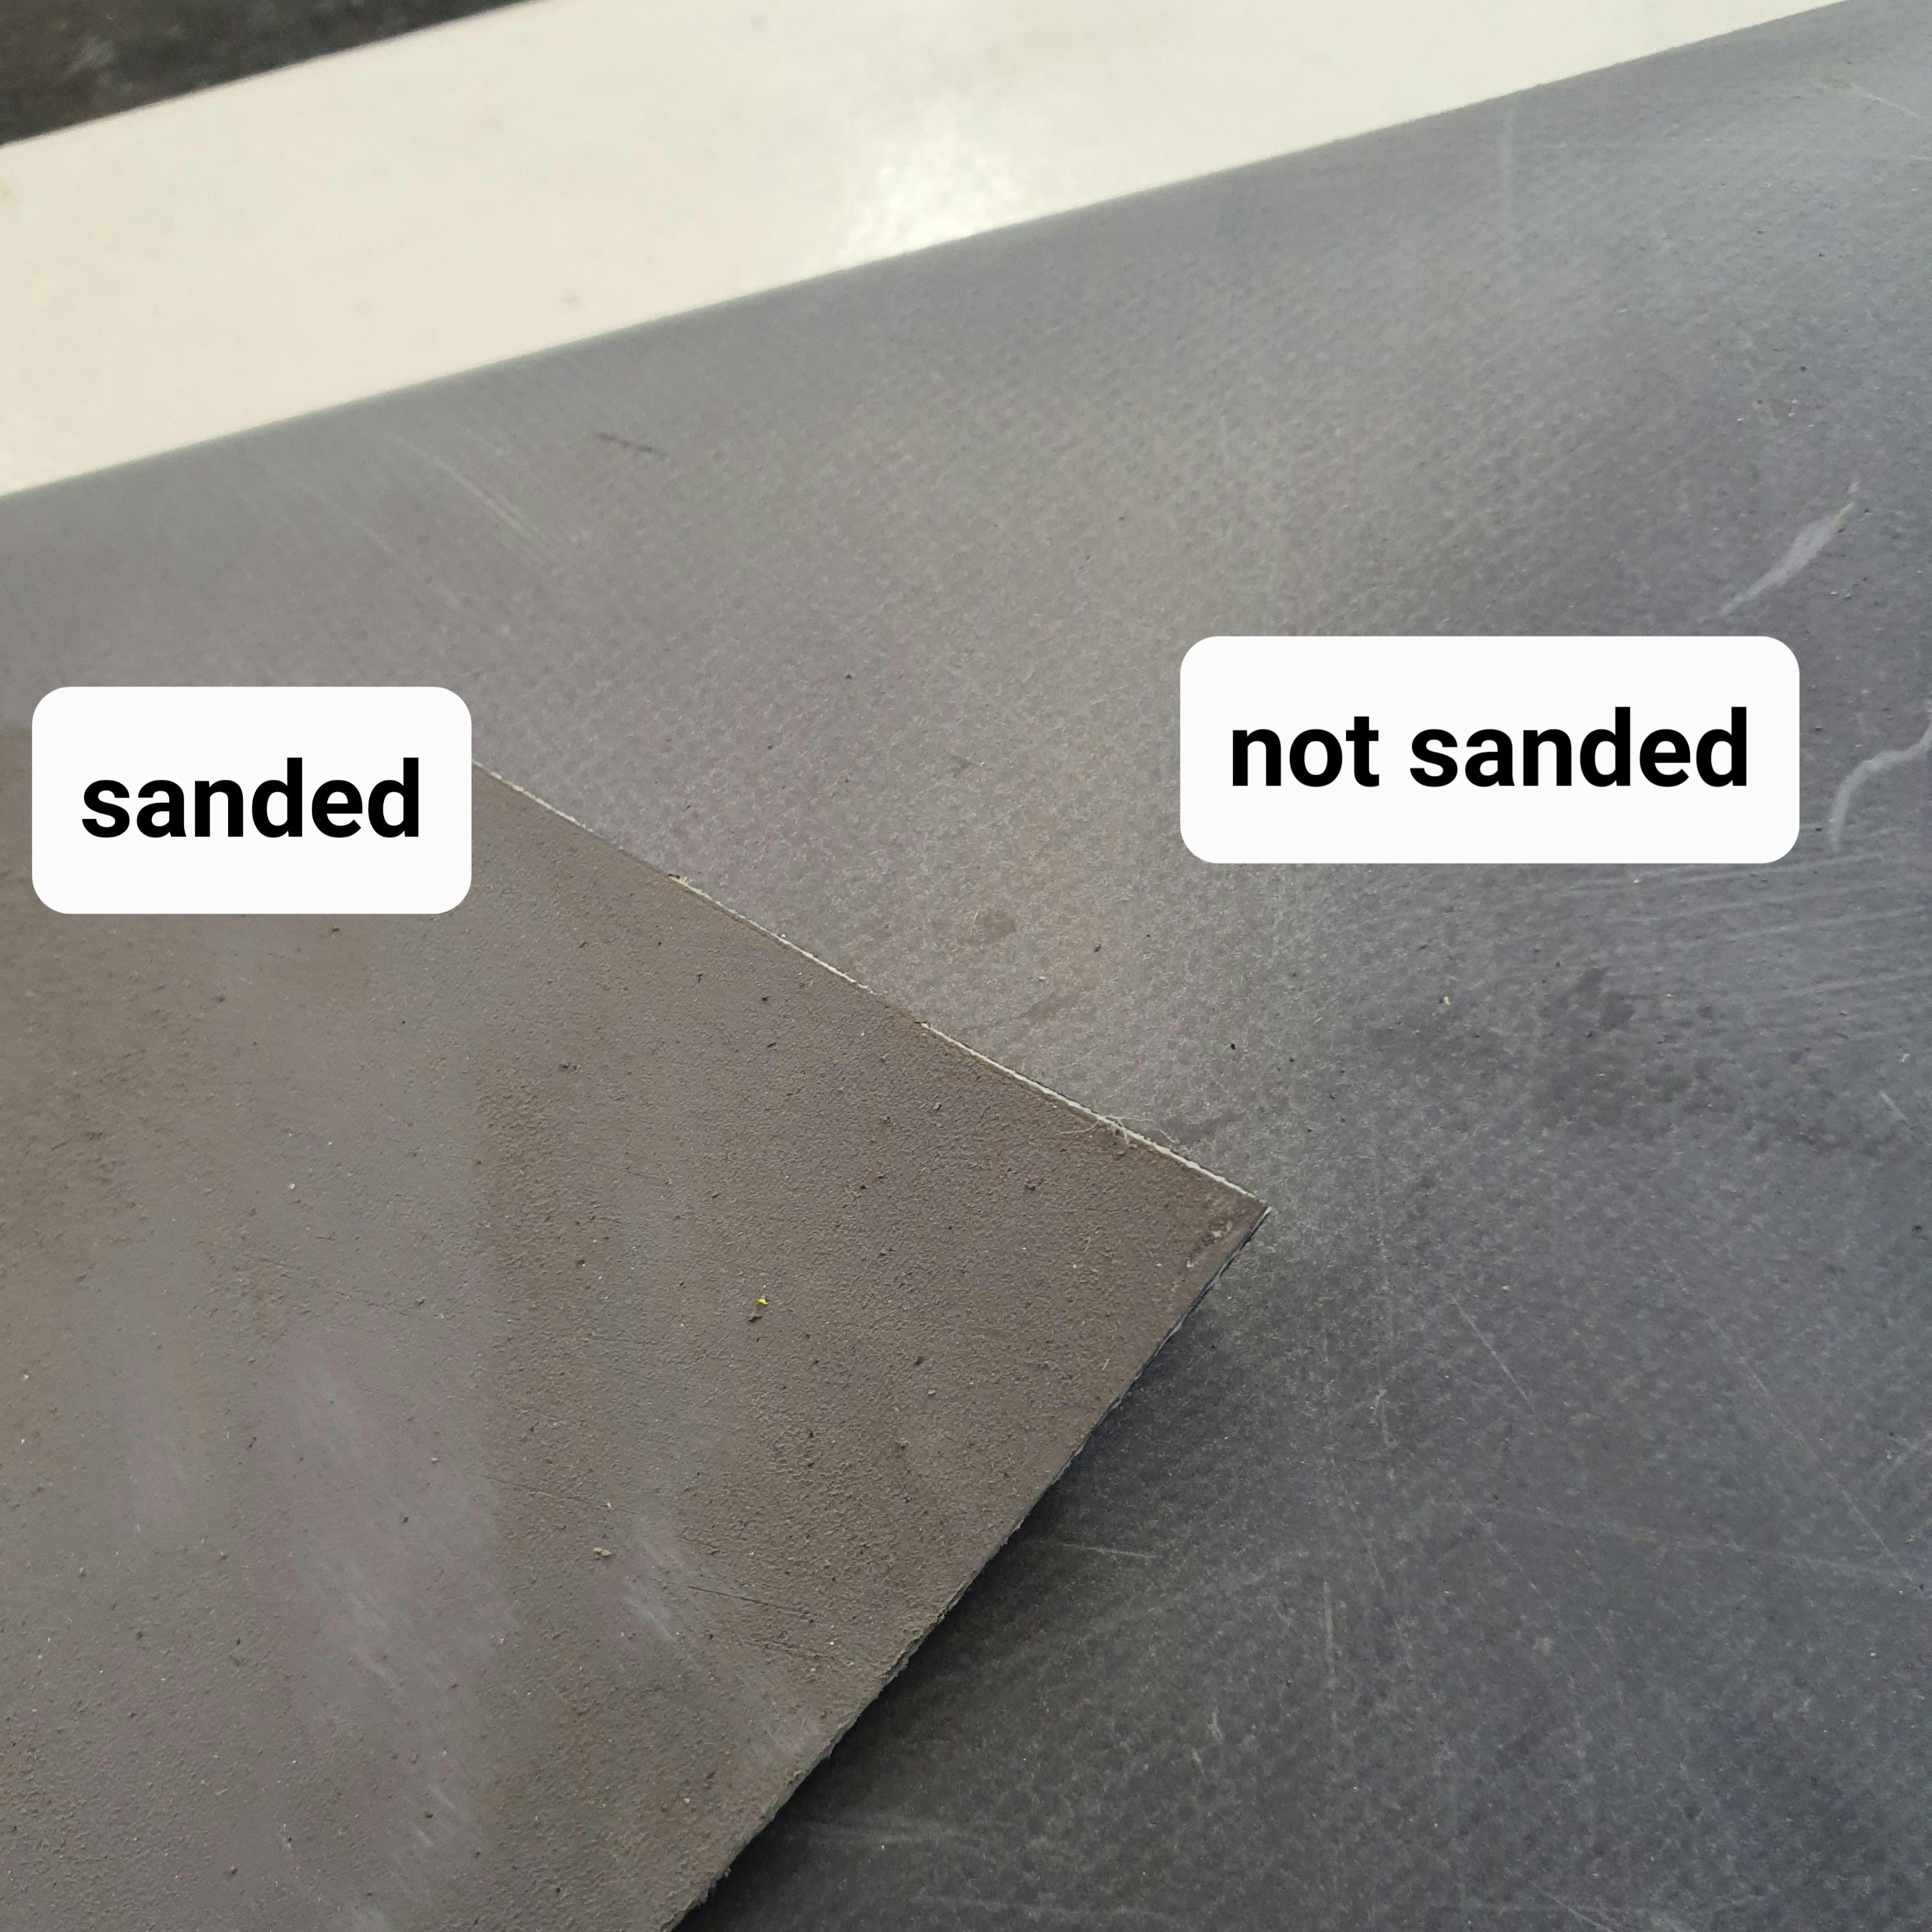
in some cases fabric can be quite old and stiff or had previous failed repairs with too much adhesive so you will then need to key up or sand off the surface or old adhesive. here is how pvc should look when sanded.
next step is to wipe with M.E.K, you should notice this will soften the fabric and make it a bit more rubbery. once this is done leave for 2 or 3 minutes then start applying glue.
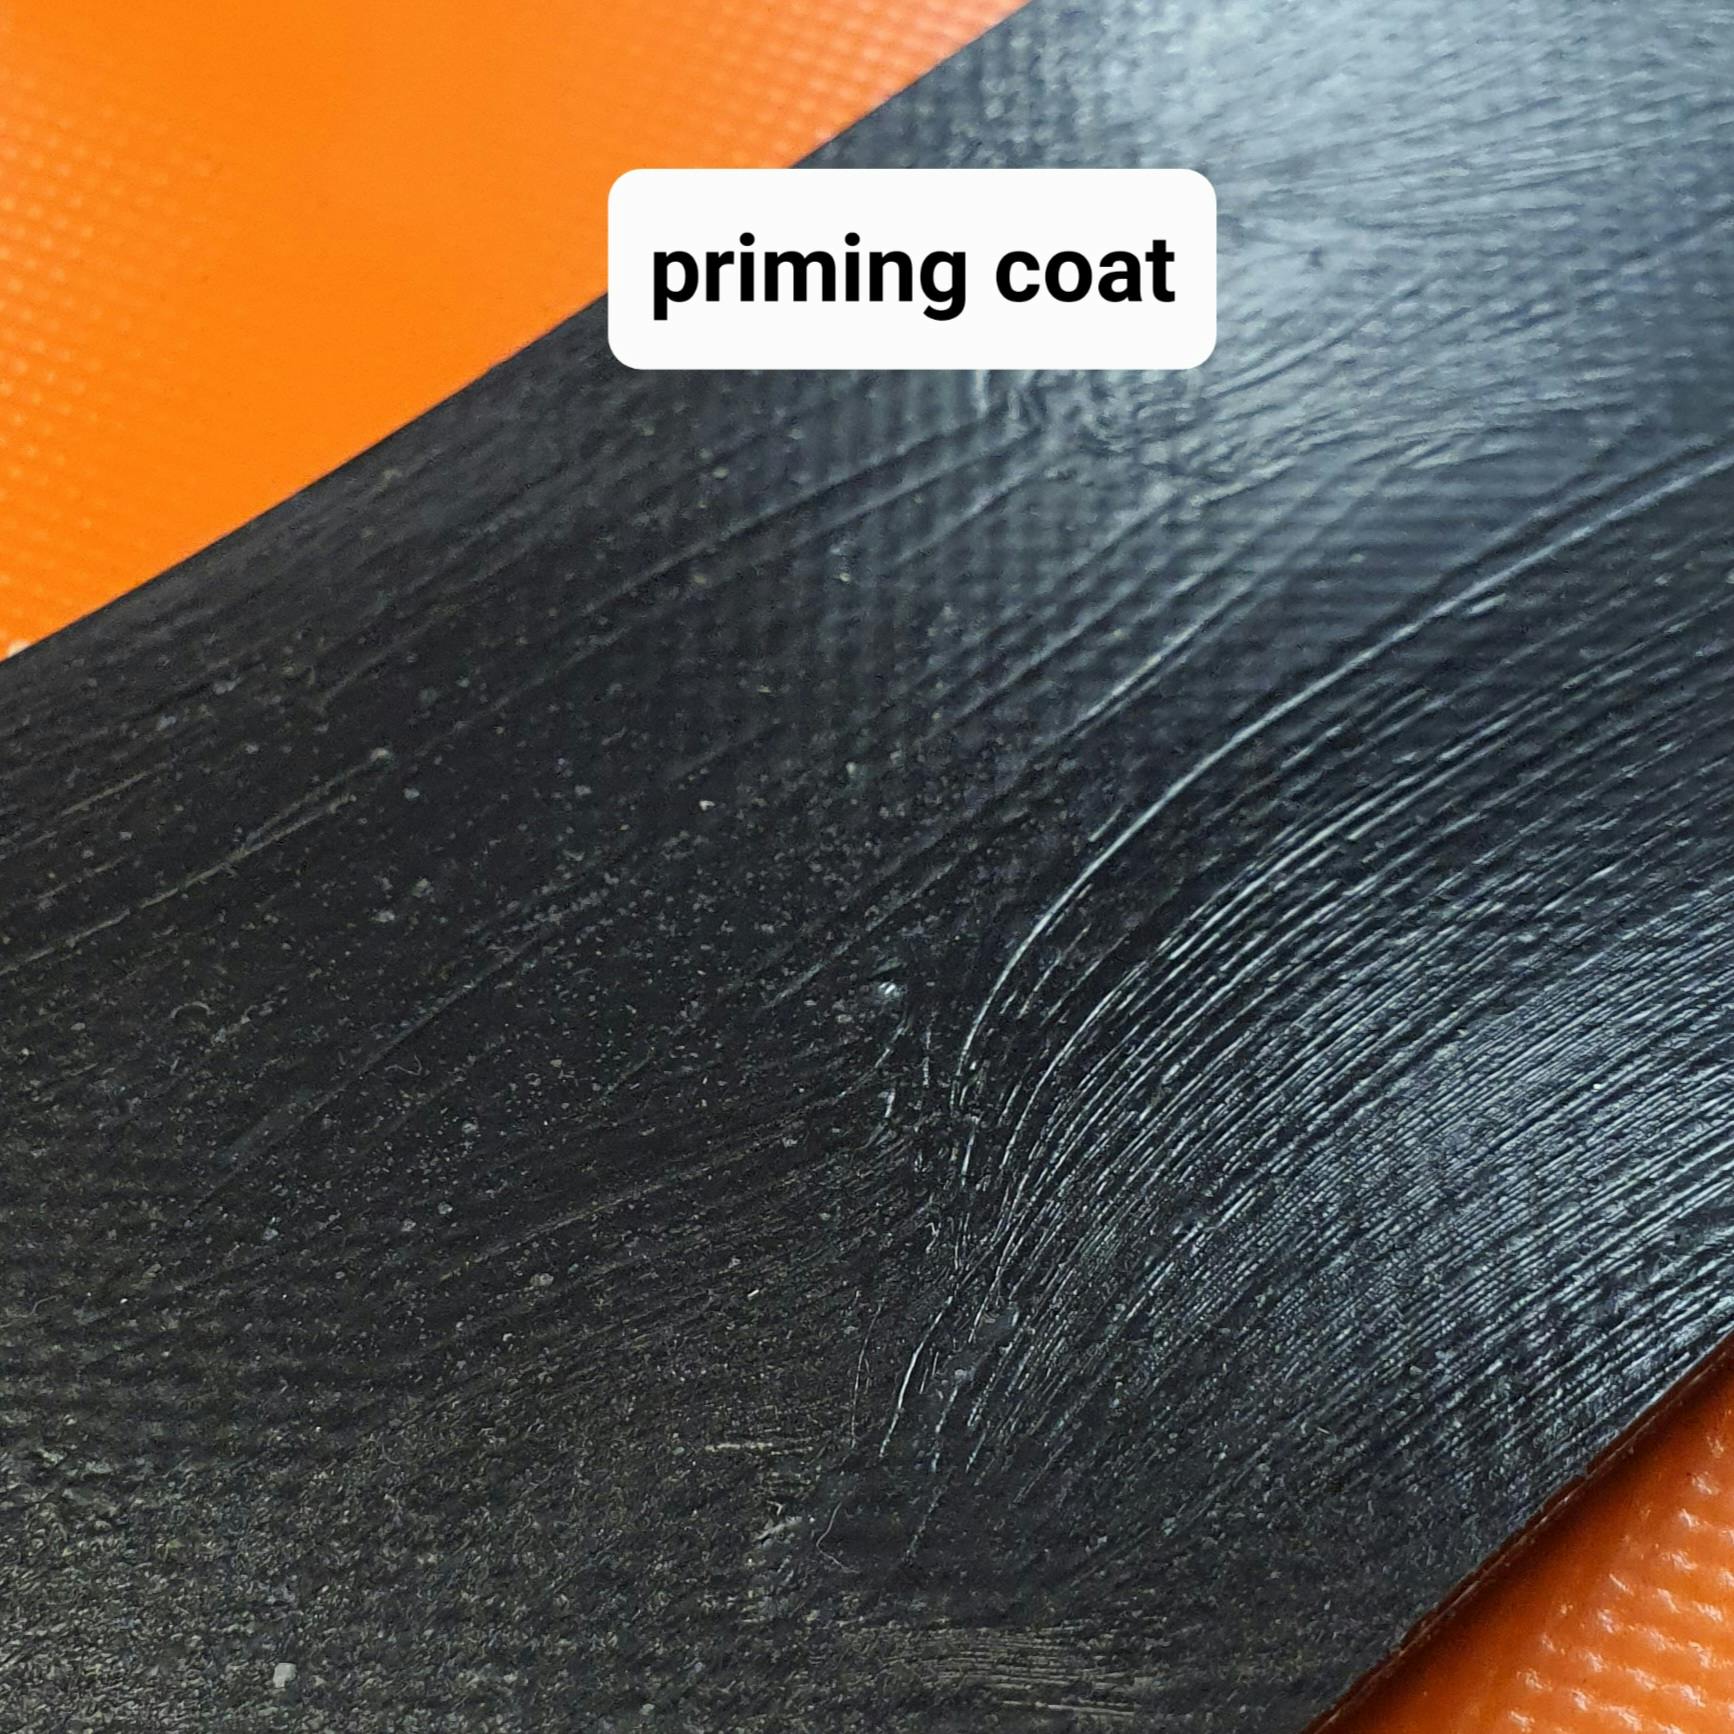
this should be applied in thin even coats. on both surfaces, a prime coat is the first coat and should be transparent and thin let it dry for an hour and re glue both surfaces leave for 5 mins then warm up both with a heat gun or hair dryer, put both glued surfaces together and roll. if it is a tube puncture as soon as you roll the patch let all pressure out. if it is something like transom or a handle leave it inflated.
failing that....
find your nearest bin or skip and relieve yourself of the stress.. ;-D
hypalon repair guide
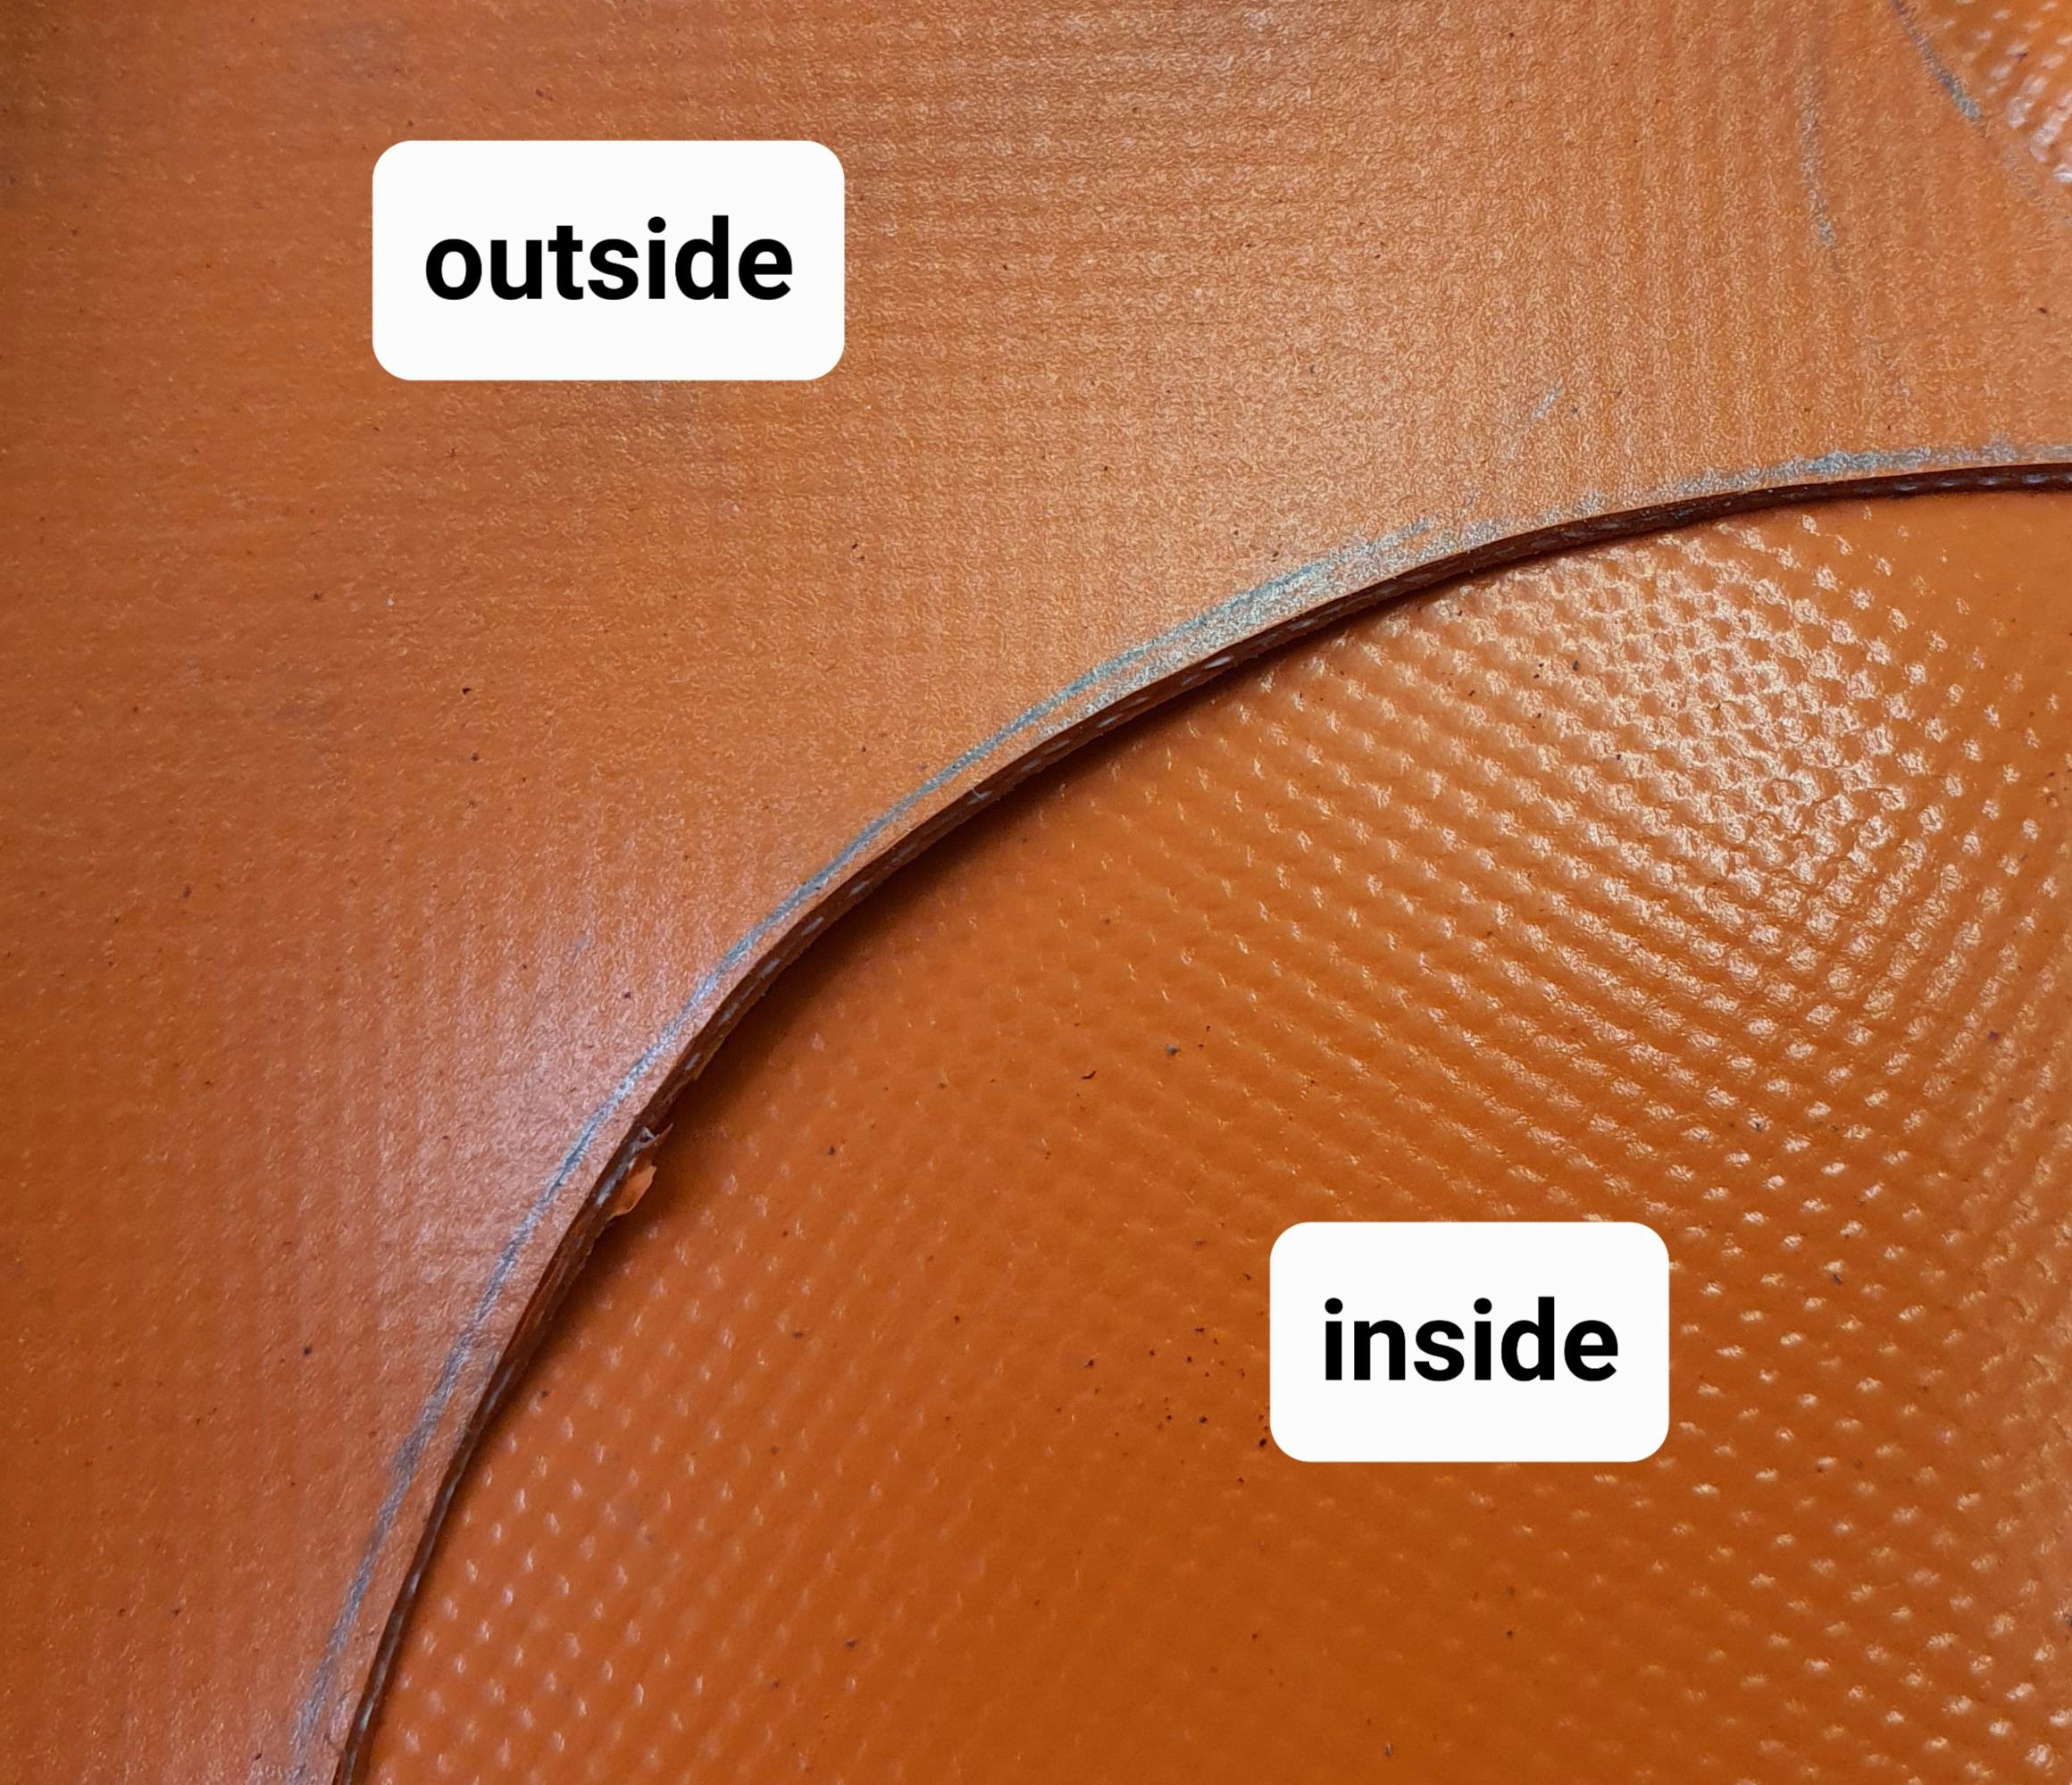
when it comes to hypalon there are a variety of different textures and finishes
carbon,honey combe, perlage, fabric impression,smooth.
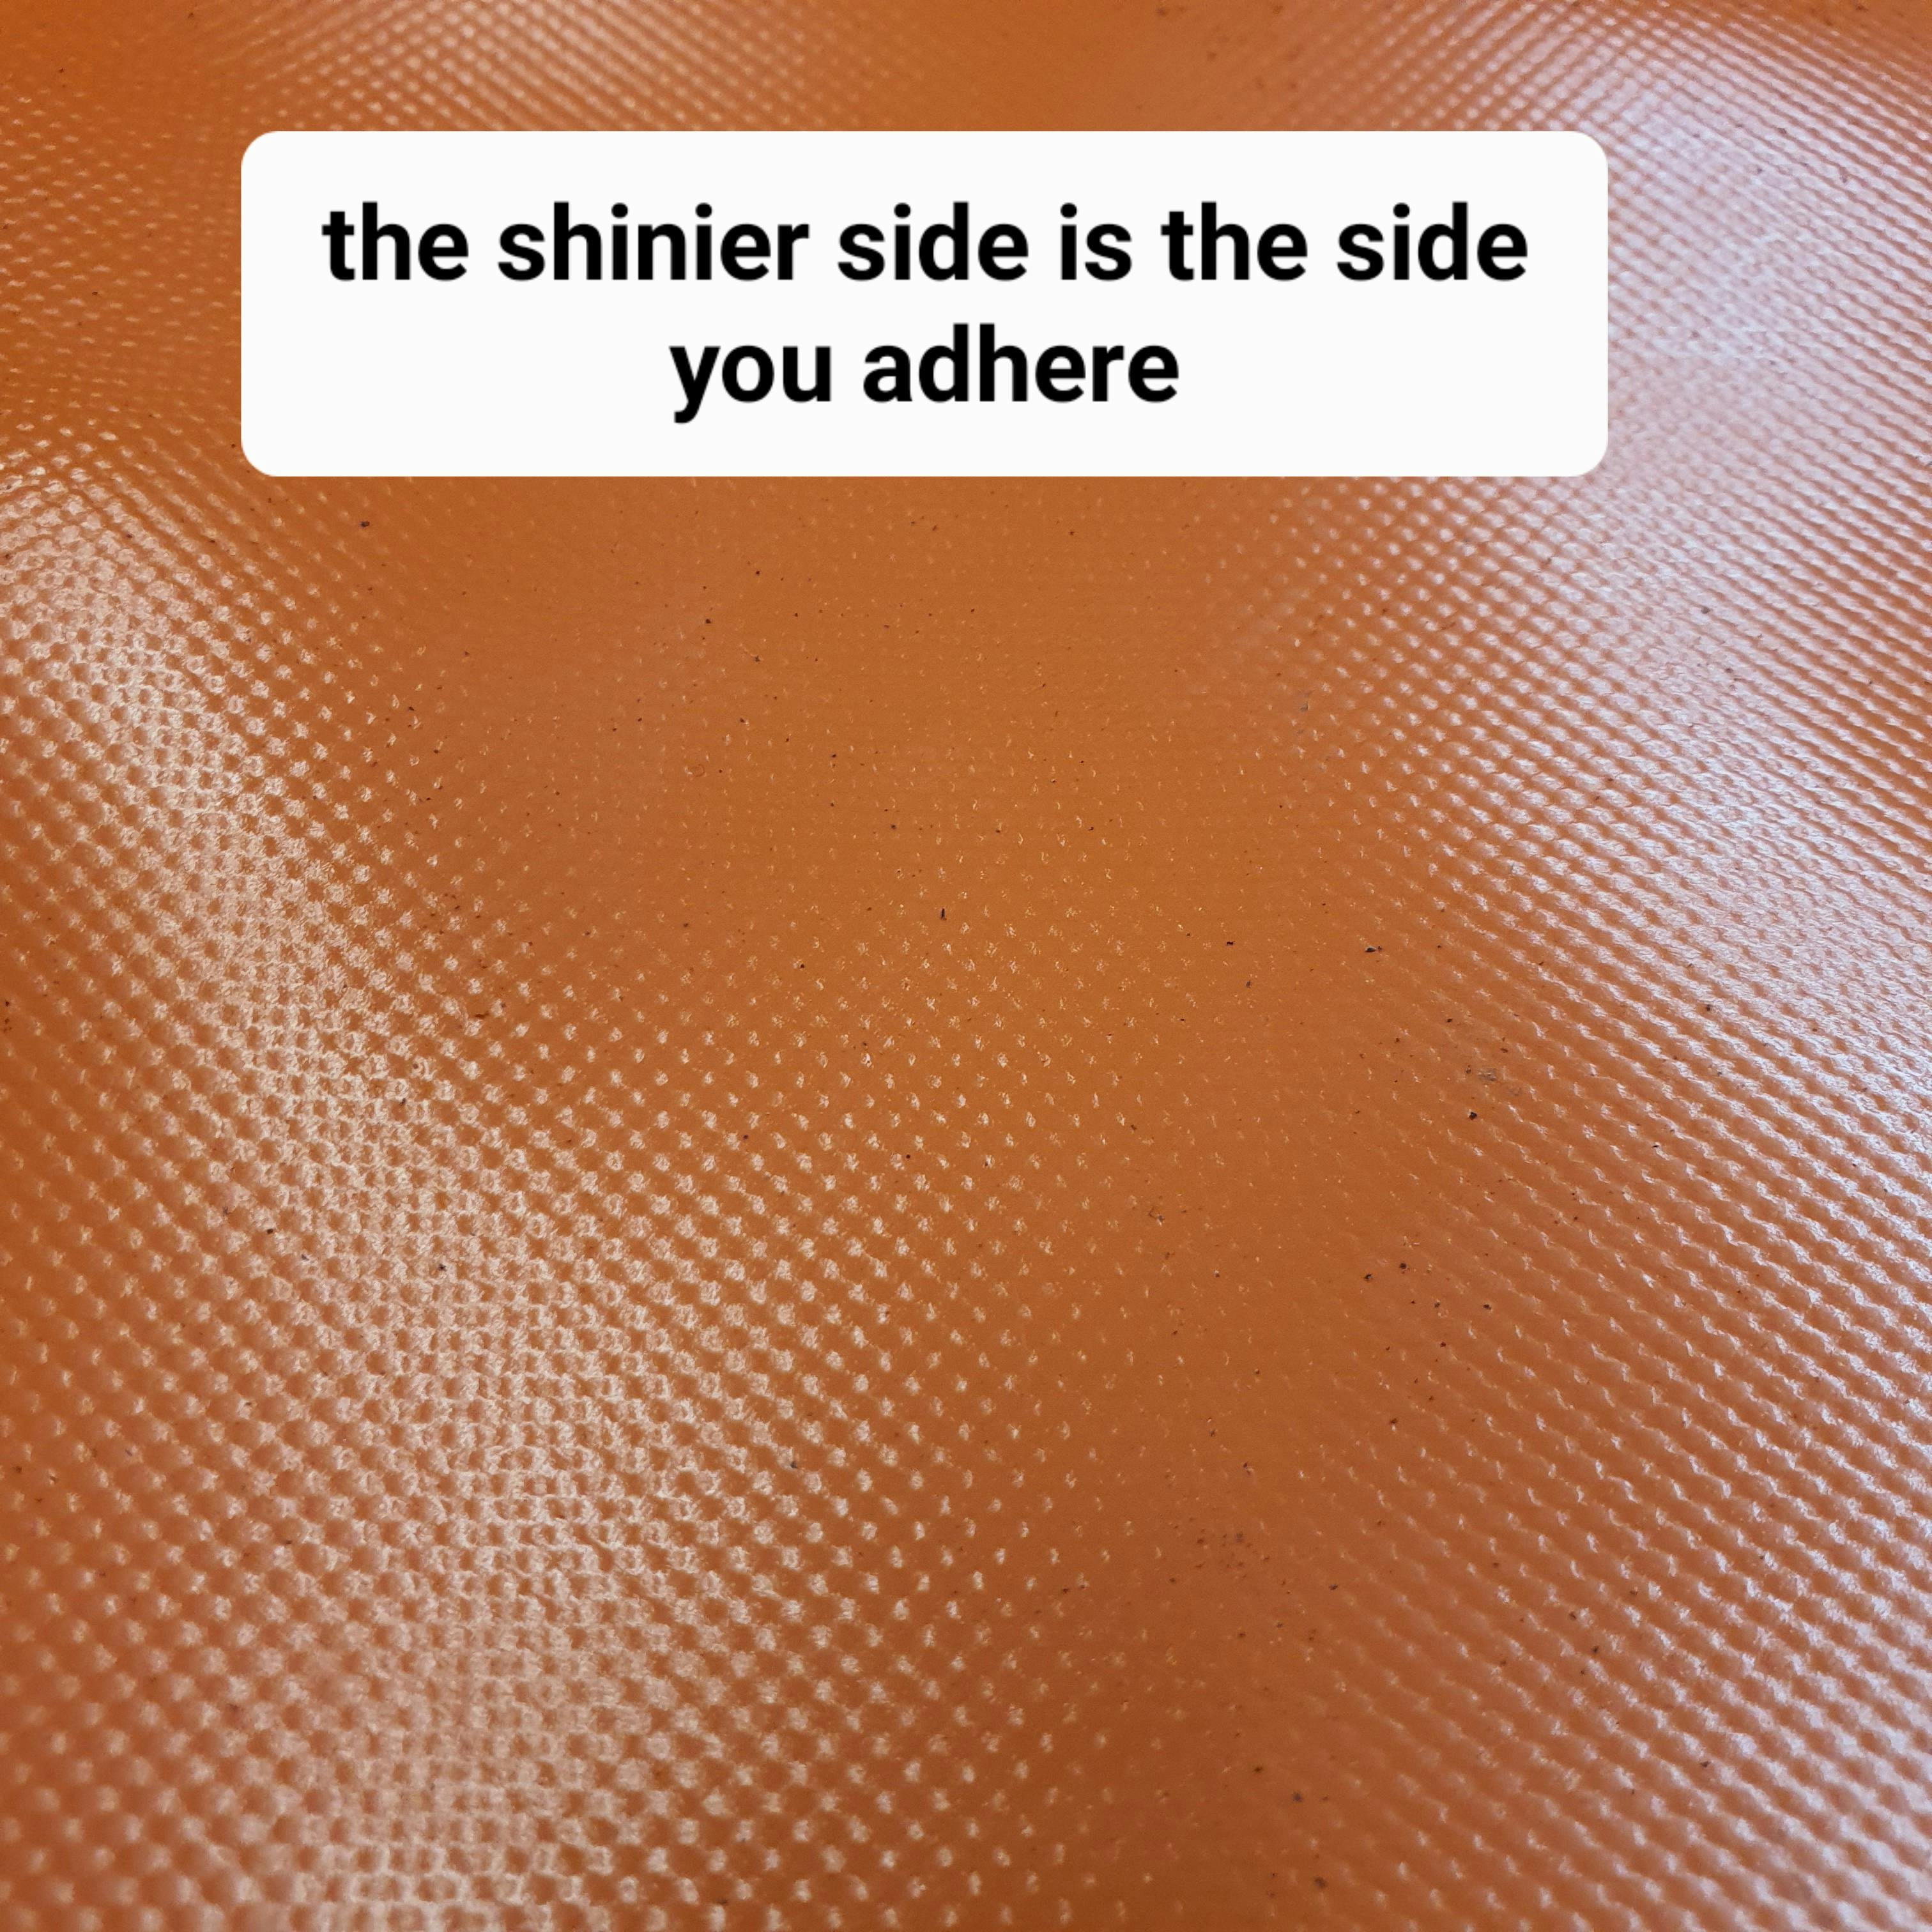
on the rear or back of the fabric there is smooth grey, non buff black and none buff grey.
all front faces of hypalon must be sanded.
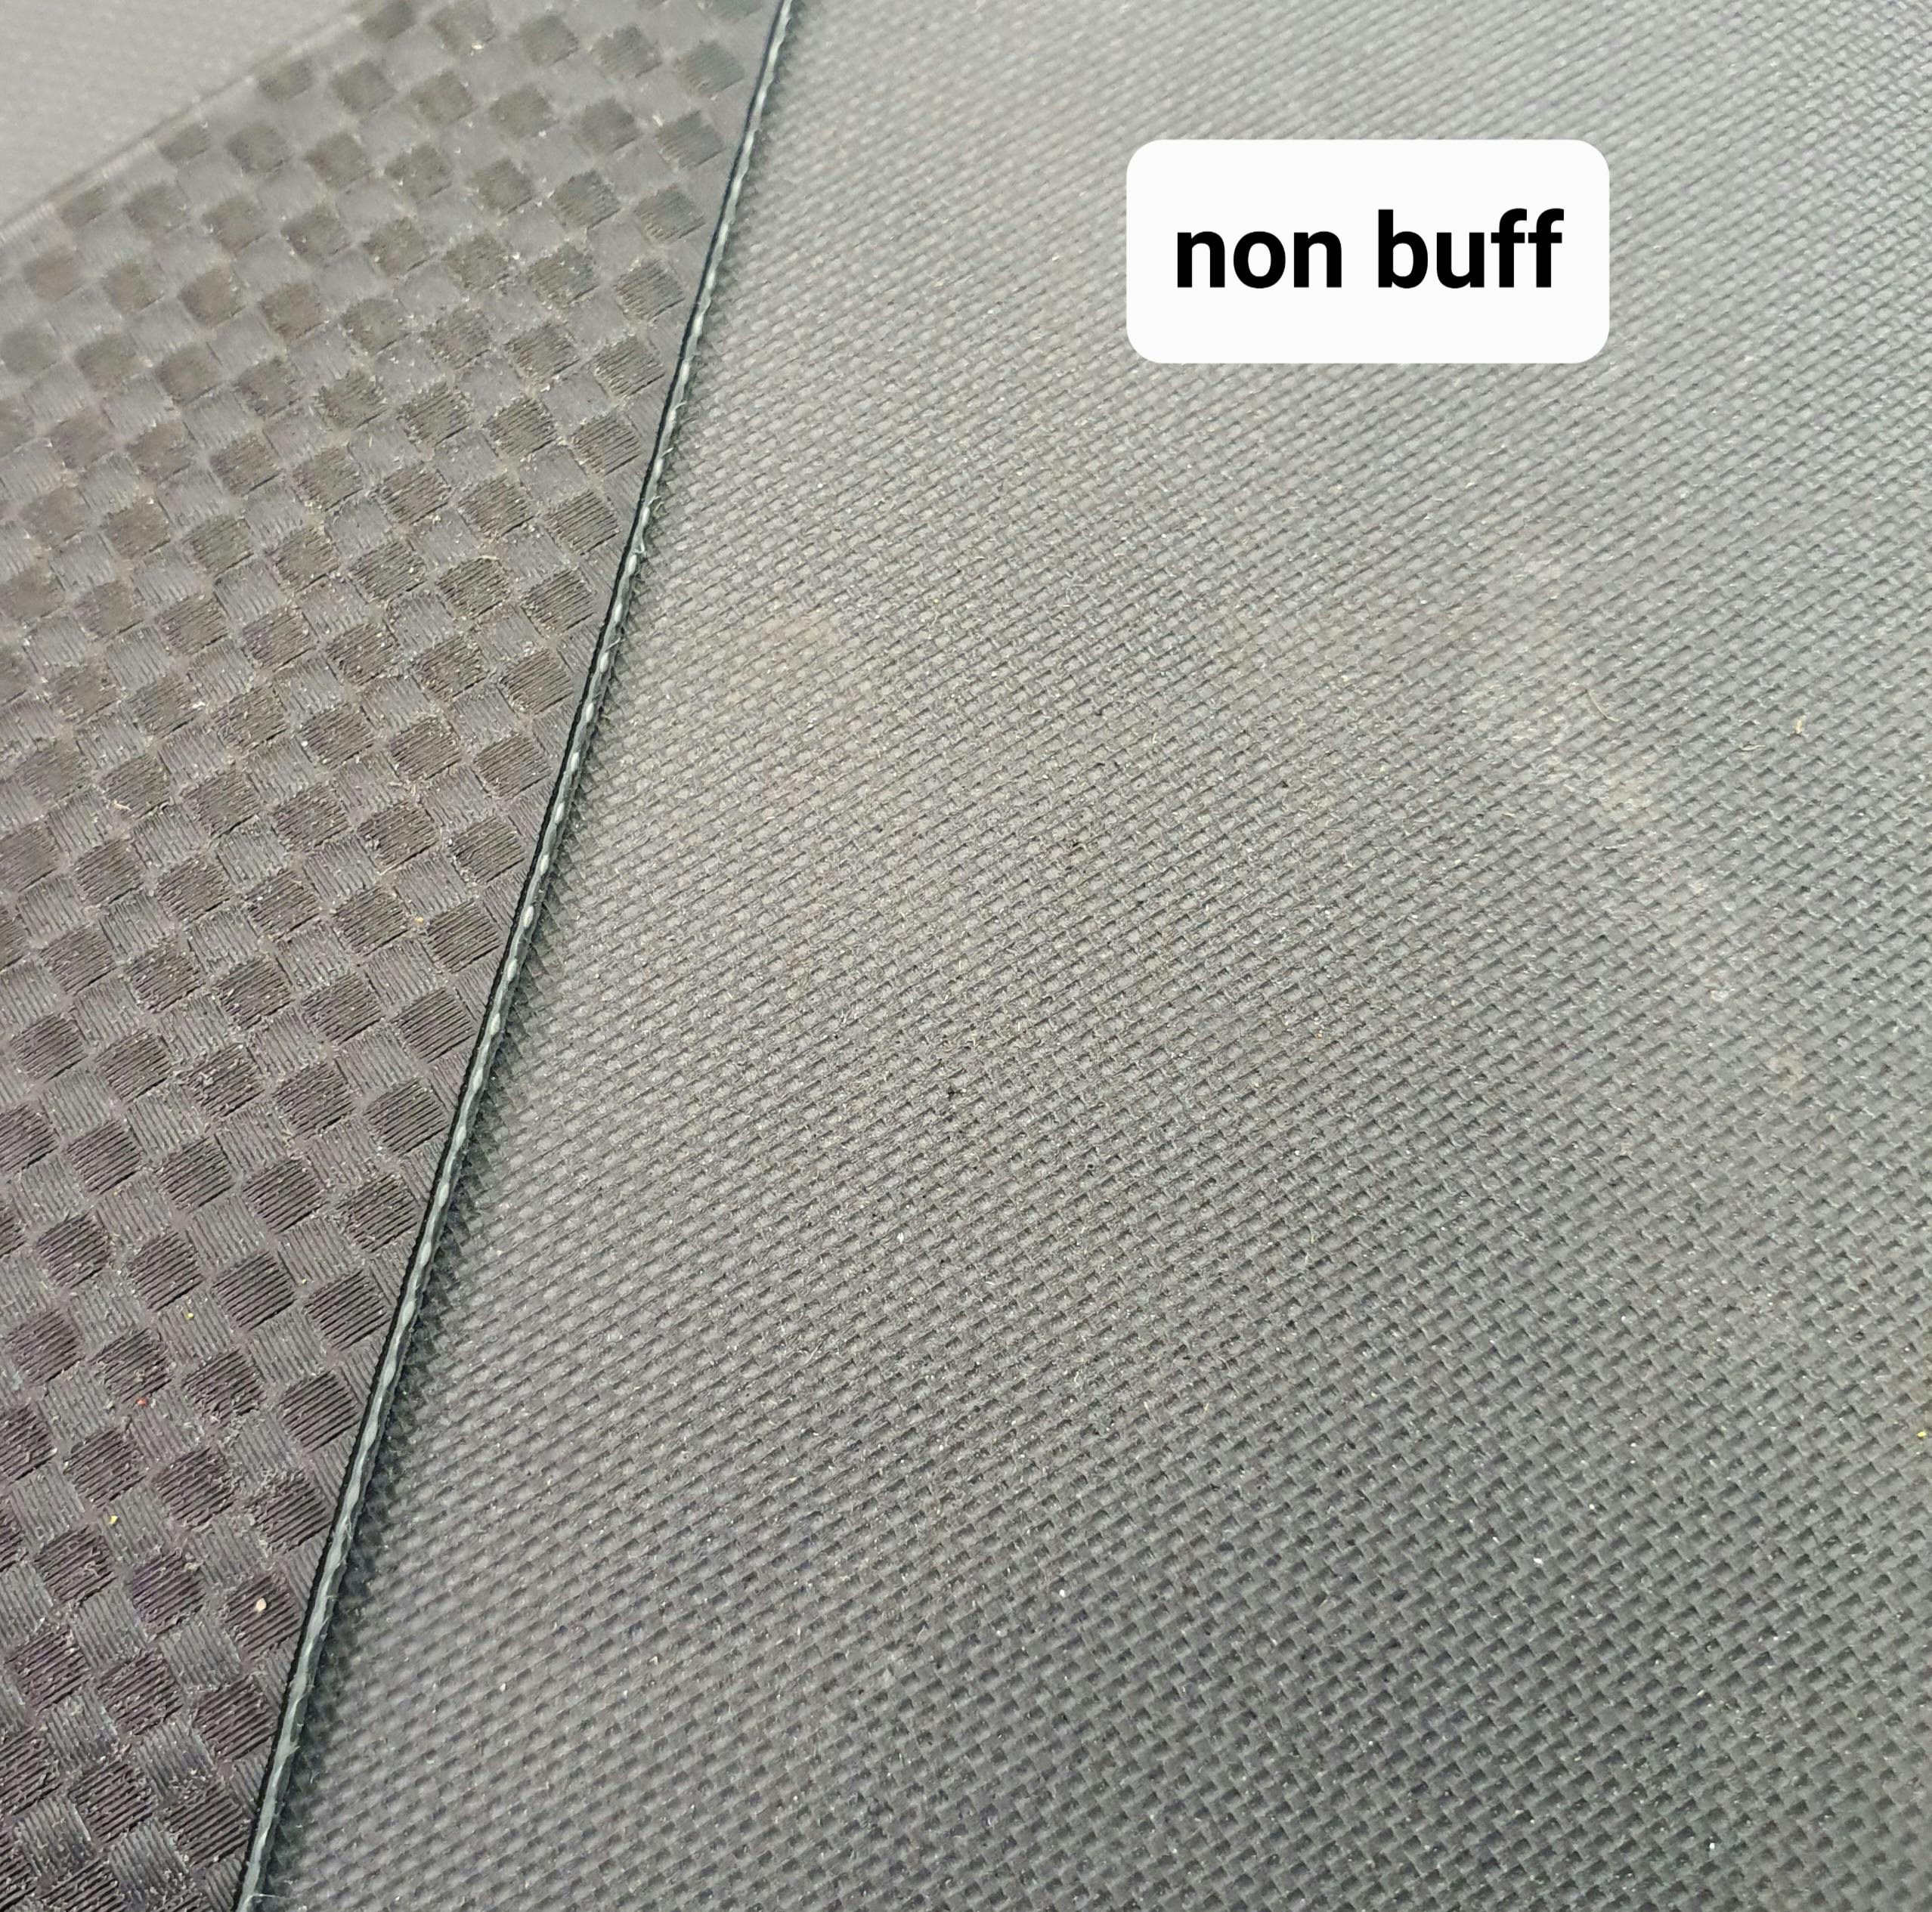
some prefer to still sand/ abraid all types of fabric regardless,
is said to be none buff material but i would recommend sanding it for peace of mind.
grey back smooth will require sanding
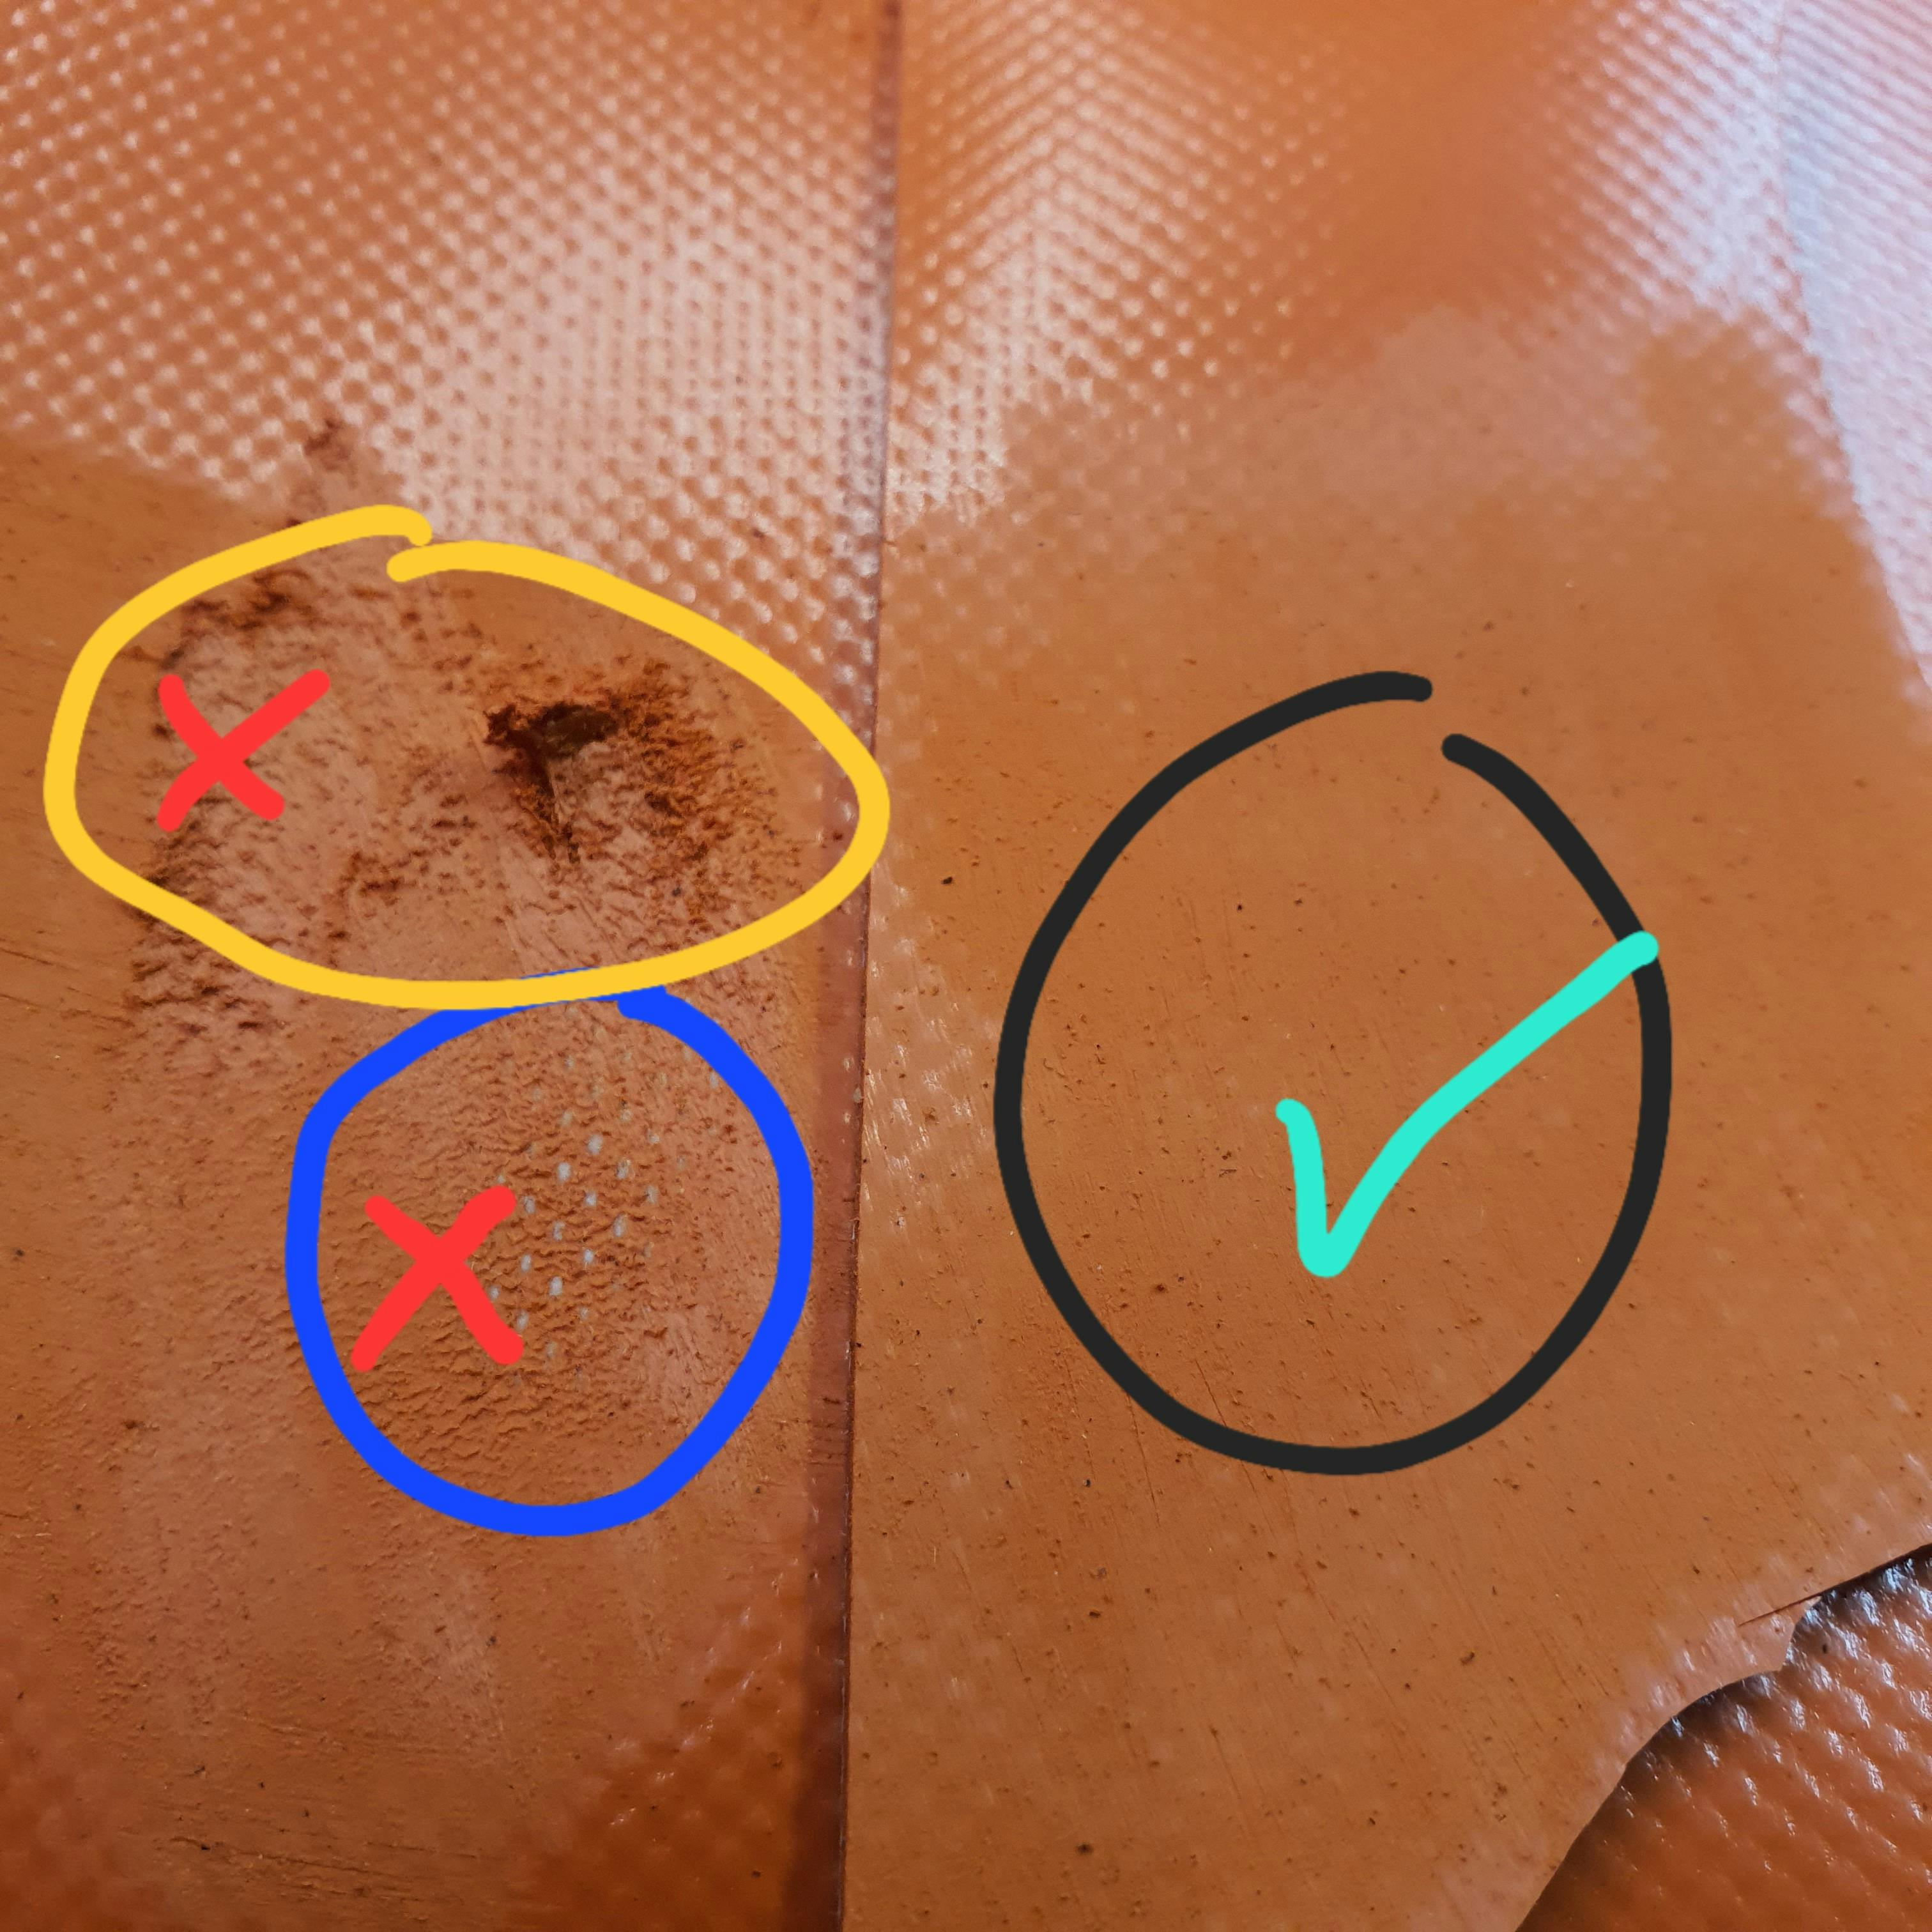
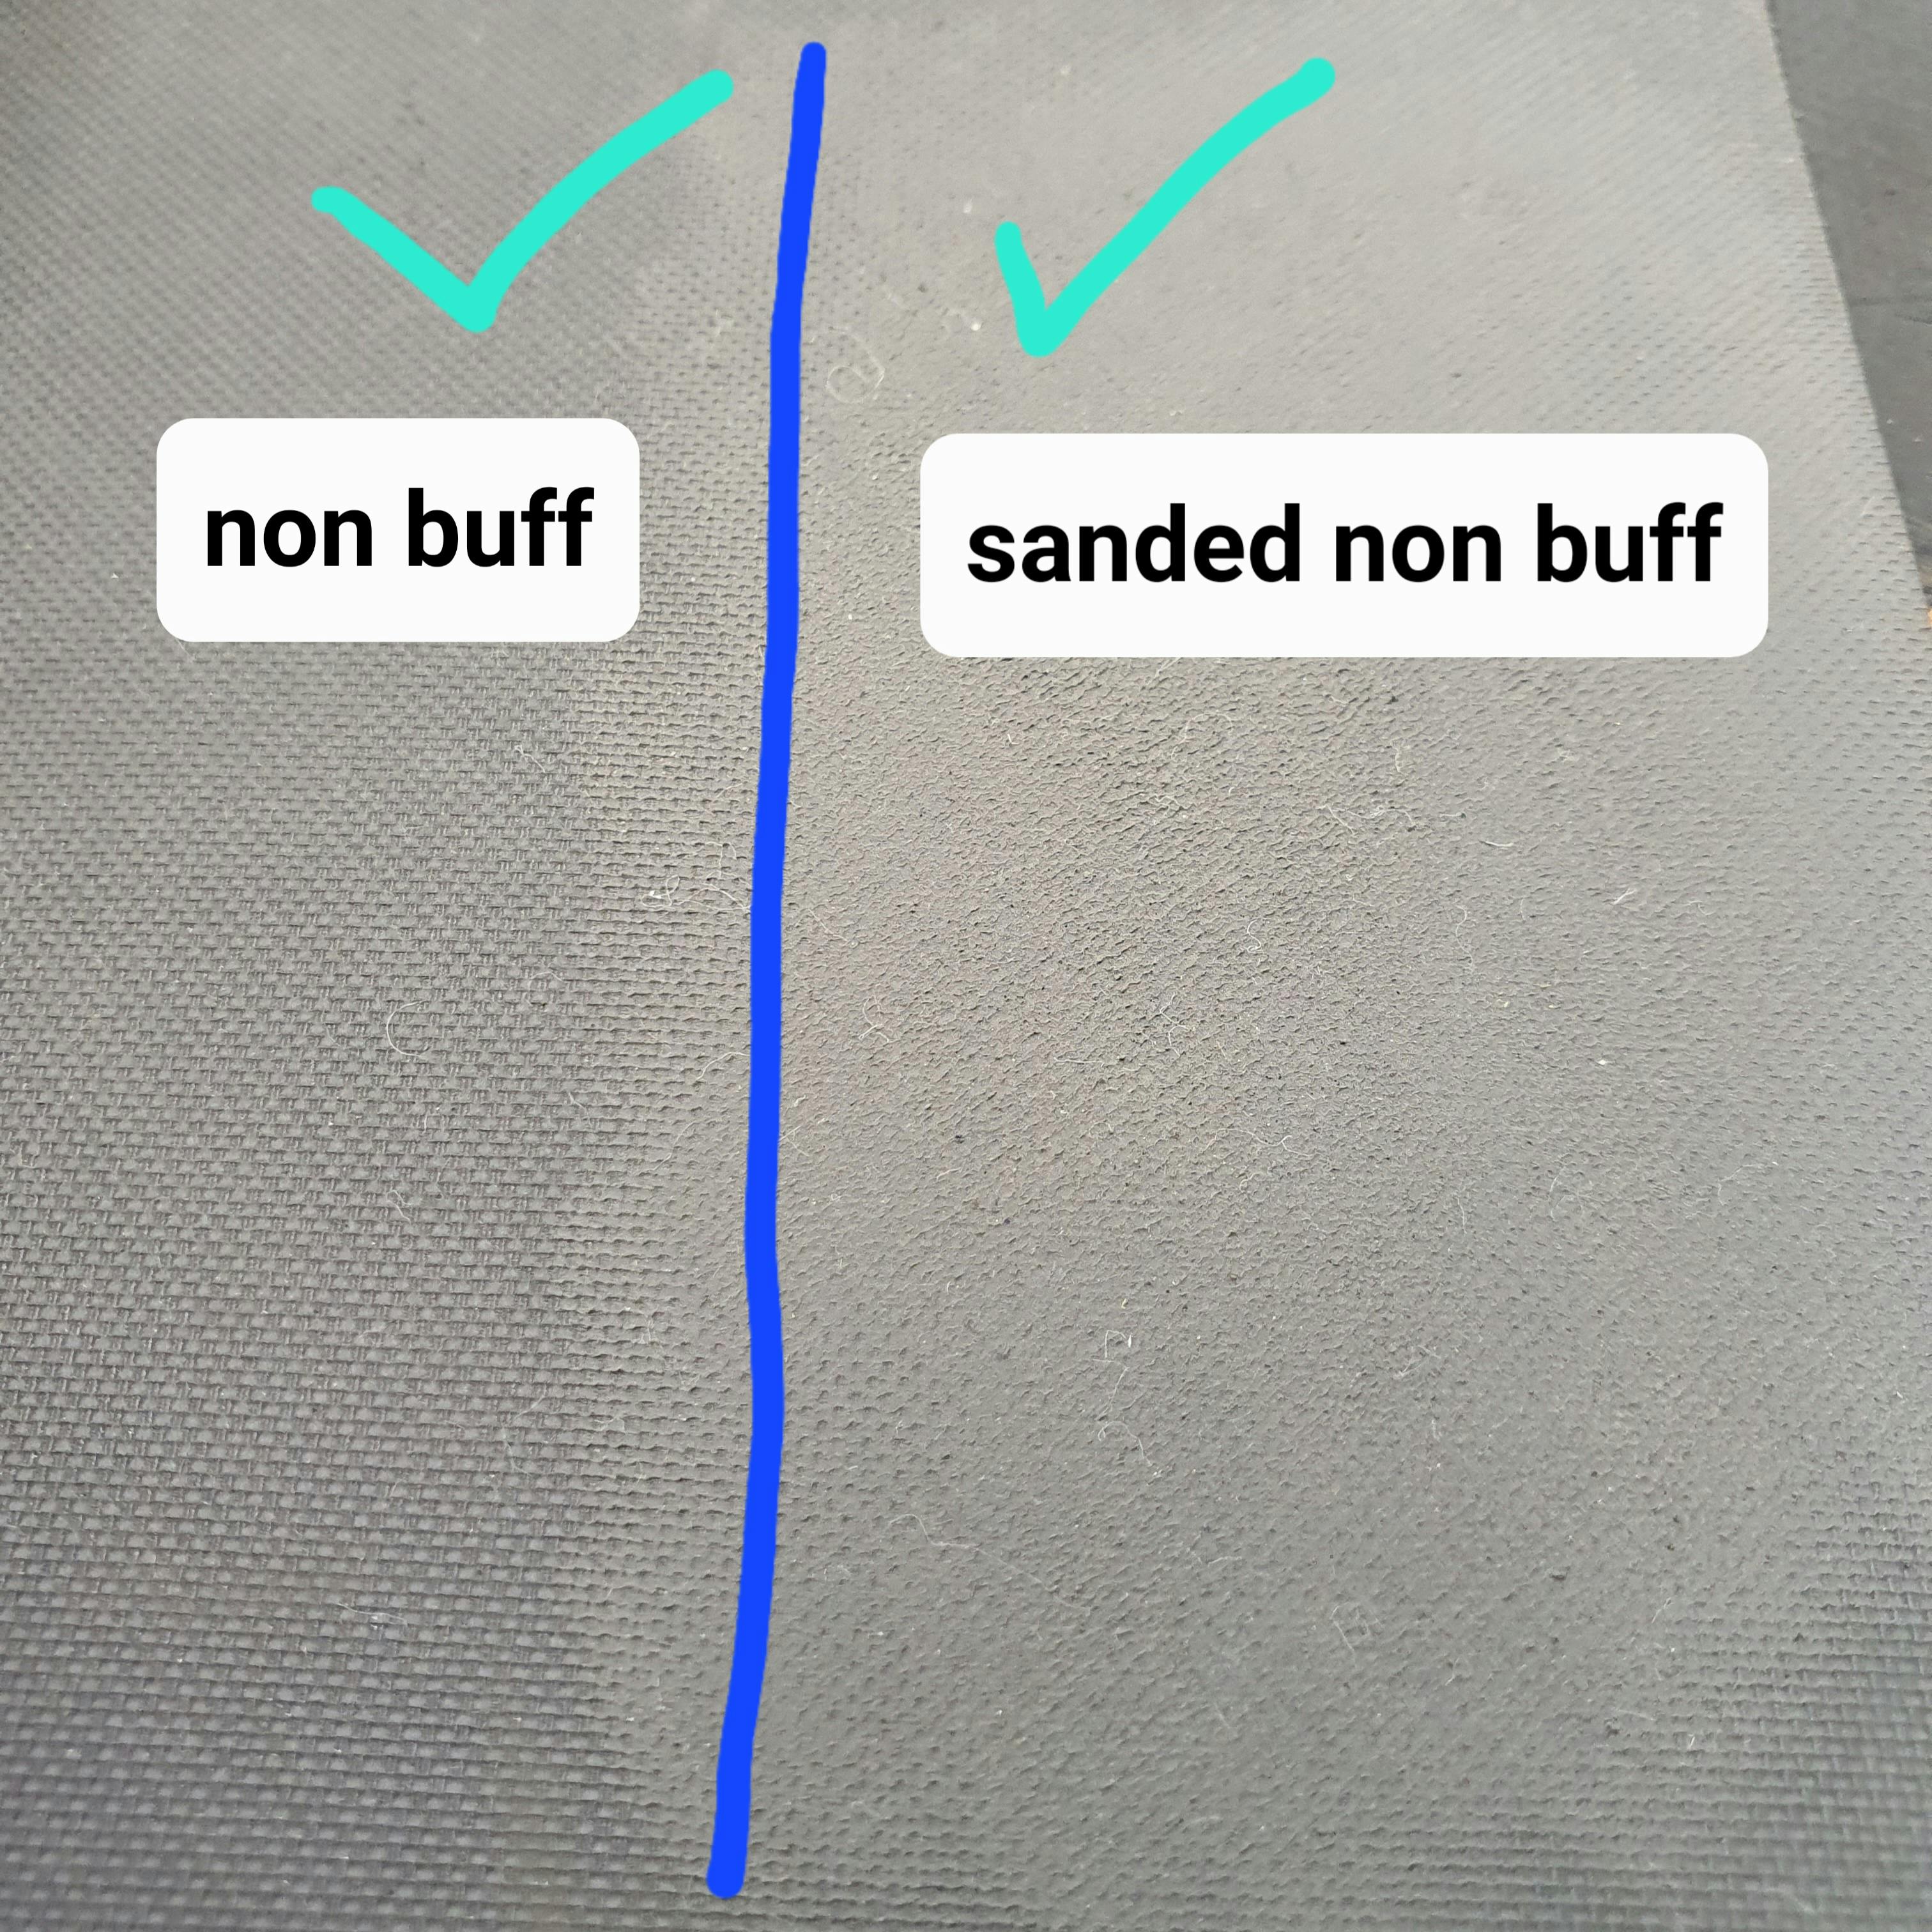
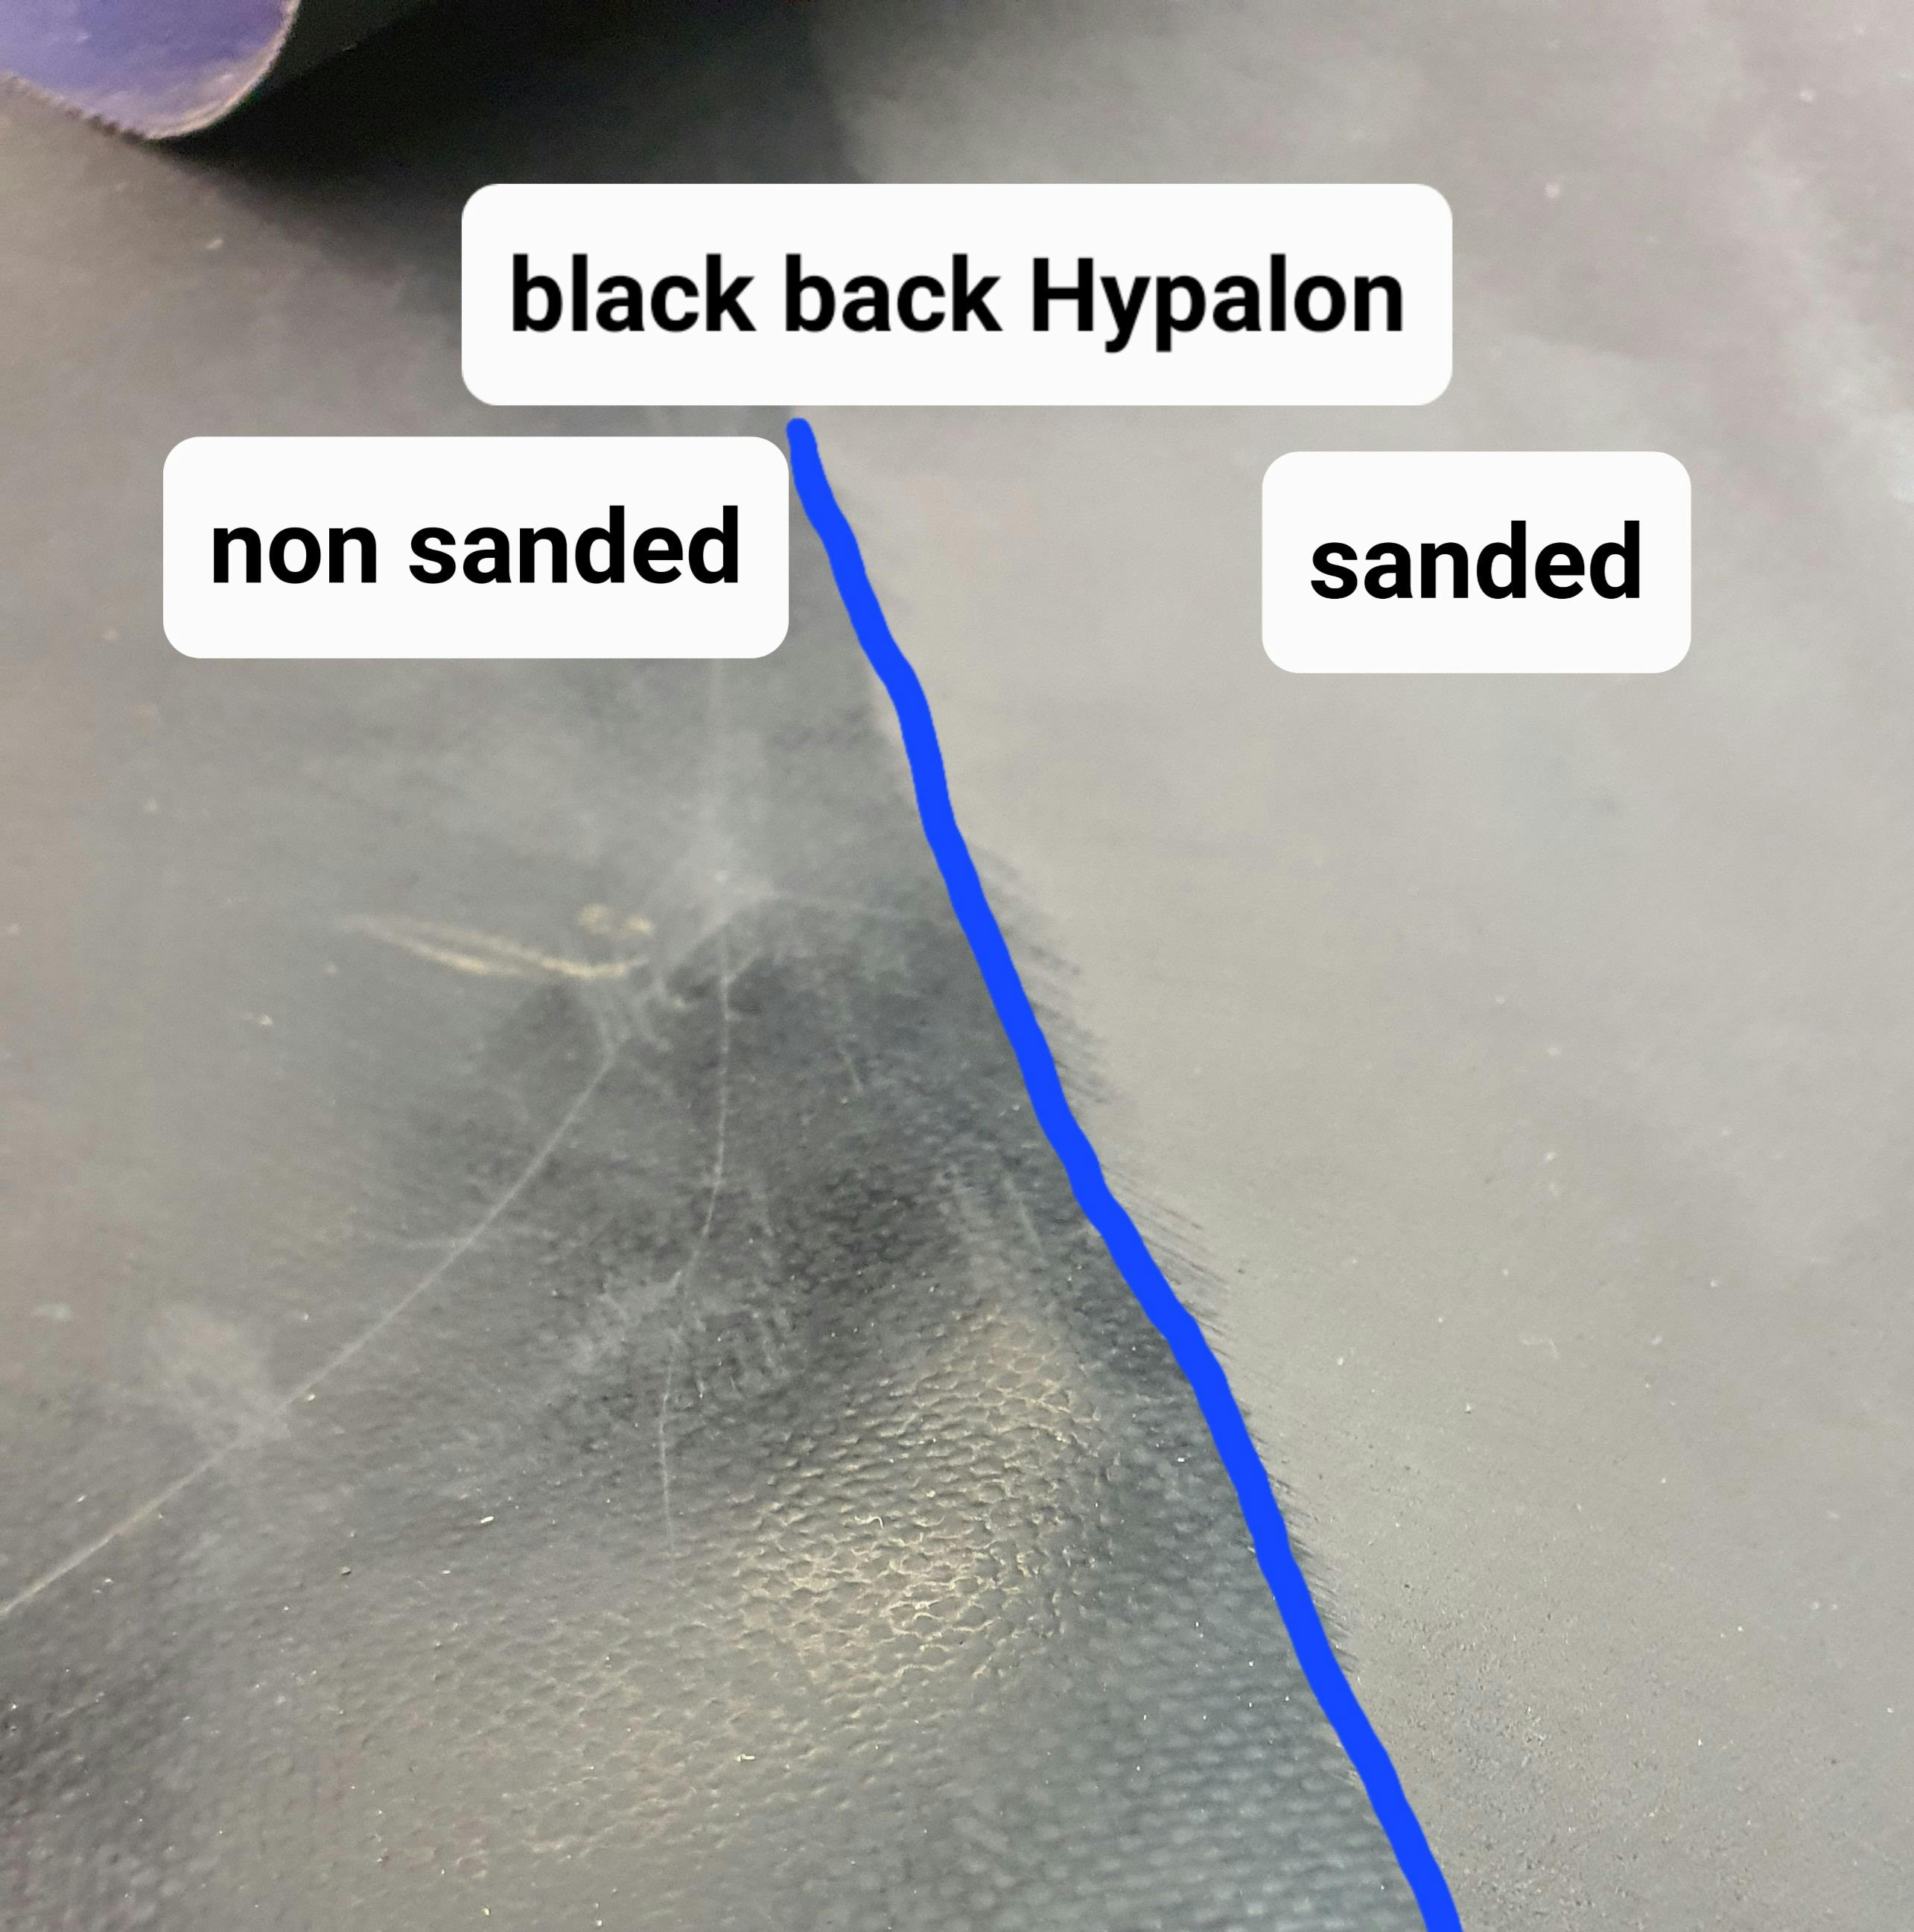
it is important to know how much to sand hypalon for the best chances of a successful repair
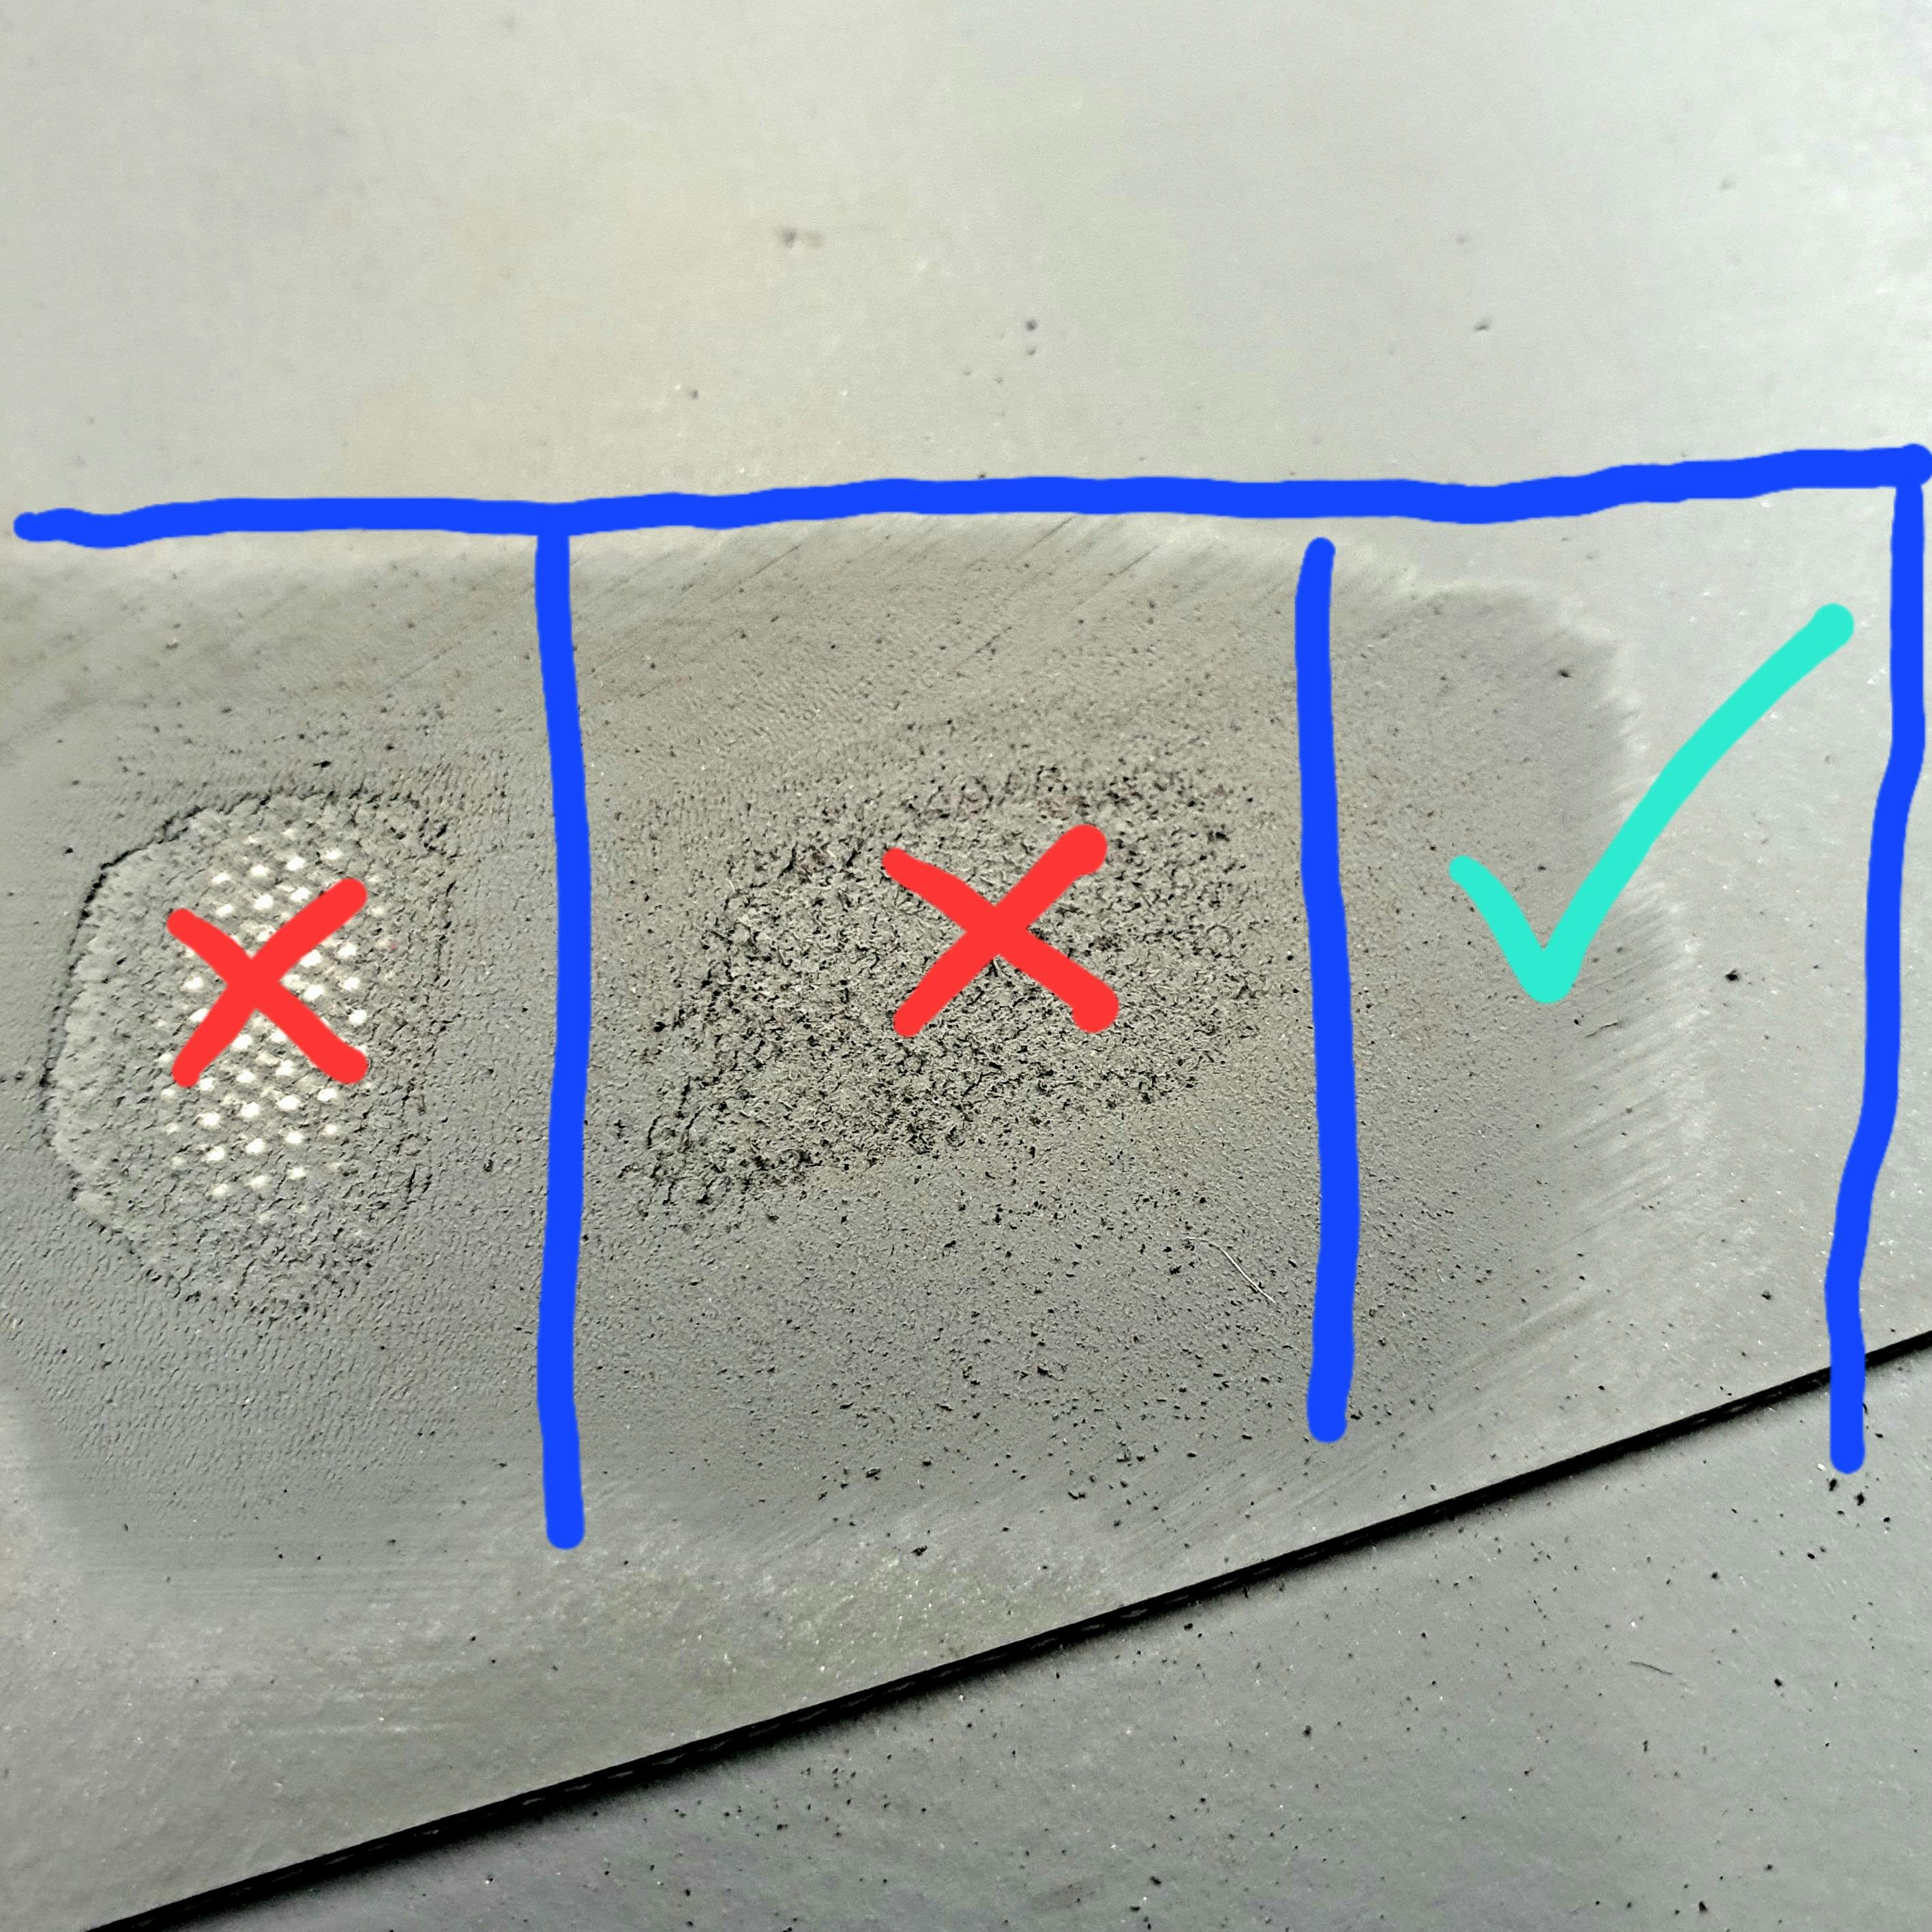
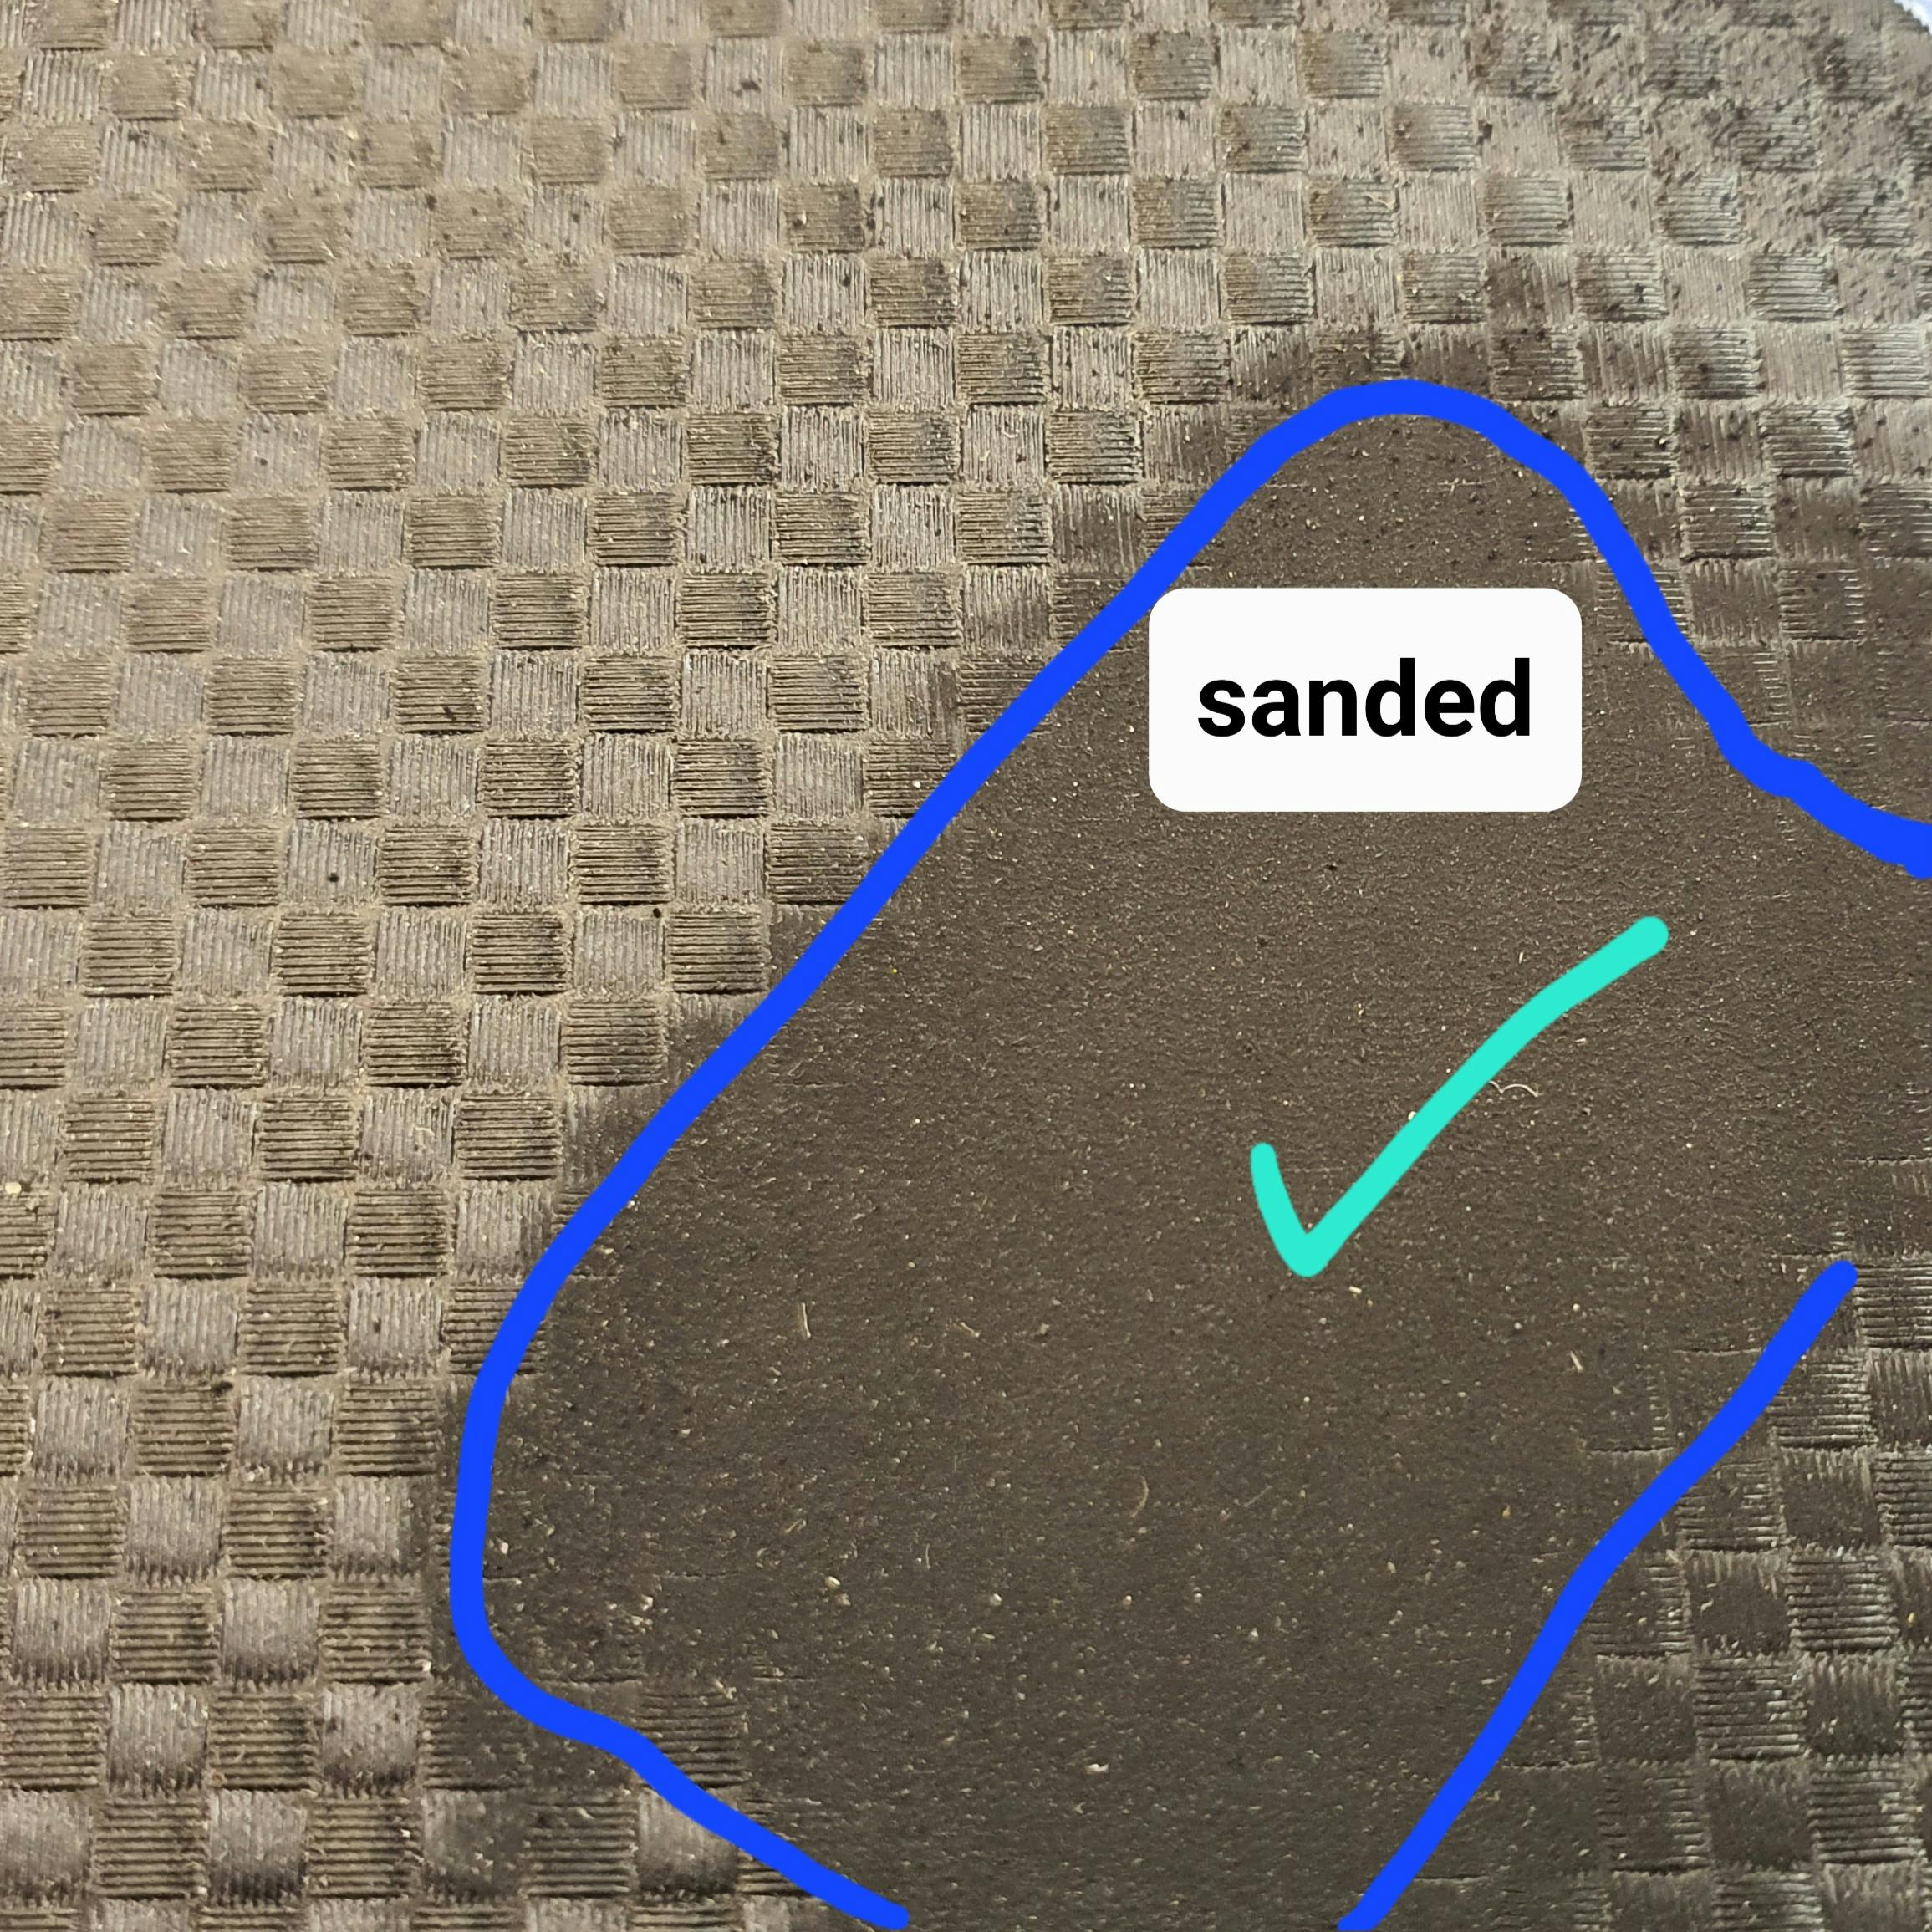
when repairing carbon or any other textured fabric, you must sand off the texture to a smooth surface
so first you should find the area that requires repairing whether it is a puncture, re attach a handle or patch.
- mark out the area and key up/ sand the surface as shown above.
- prime (first coat) with a good 2 part adhesive and leave for an hour
- re glue both surfaces and leave a few minutes
- apply the patch, handle or stick down and if its a puncture repair let tube down immediately after rolling with a seam roller or other blunt object
- leave at least 24hrs before inflating or putting any strain on glued areas
p.u repair
when repairing p.u its important to remember that p.u doesn't always need sanding, if its newish fabric you can wipe it thoroughly and glue without sanding, if its older then the surface will need sanding with a fine sand paper
- wipe with acetone or toluene
- use same adhesive as hypalon.
- prime and leave an hour or 2
- re glue
- put both surfaces together
- roll thoroughly
- leave 24 hours
failing that retube it with apparently "inferior hypalon" and live happily ever after.. ;-)
repairing a leafield inflation valve
To repair a Leafield inflation valve, follow these steps:
- Identify the problem: Determine what specific issue you are experiencing with the valve. It could be a leak, difficulty inflating or deflating, or a damaged component.
- Gather the necessary materials: You will need a repair kit specifically designed for your Leafield valves, which typically includes replacement mushroom, spring and stalk Additionally, have a clean cloth, rubbing alcohol, toothbrush for cleaning valve spanner/pipe grips.
- with tube inflated use valve spanner or large pipe grips to undo/loosen the valve then deflate the tube Ensure the boat is completely deflated before attempting any repairs on the valve. This will make the process easier and more effective don't lose the back of the valve inside the tube.
- Remove the valve cap: Unscrew the valve cap counterclockwise to access the inner components of the valve. Set the cap aside in a safe place and push the stalk in to open the valve lock it open if possible.
- Clean the valve: Use a clean cloth and rubbing alcohol to wipe down the valve's exterior , plunger seal seat and remove any dirt, debris, or adhesive residue. This will help ensure a proper seal during the repair.
- Inspect the mushroom(seal) plunger: check inside the valve for damage, wear, or deformation. If they are worn or damaged, they need to be replaced.
- Replace the plunger,shaft and spring, Ensure it sits snugly and evenly by pulling it off the end of the shaft then unlock the shaft and pull it out through the front. on b7 and a7 you will need to do this inside the tube by rotating the back part of the tube around and unscrewing the seal/ plunder off the end of the shaft.
- once parts are replaced or cleaned refit and Tighten the valve: Use a valve wrench/spanner or pipe grips to tighten the valve securely. Be cautious not to overtighten, as it can damage the valve or cause leakage.
- Test for leaks: Inflate the boat partially and apply a mixture of soapy water to the valve area. Look for any bubbles indicating air leakage. If you notice bubbles, check the valve's tightness or inspect the seals for any issues you can double up the spring in some cases.
- Reinstall the valve cap: Once you are satisfied with the repair, reinstall the valve cap by screwing it back onto the valve clockwise. Ensure it is tightened securely.
By following these steps, you should be able to repair a Leafield C7,D7,A7 or B7 inflation valve. If you encounter any difficulties or the issue persists, it may be best to contact us or another a professional boat repair technician for further assistance.